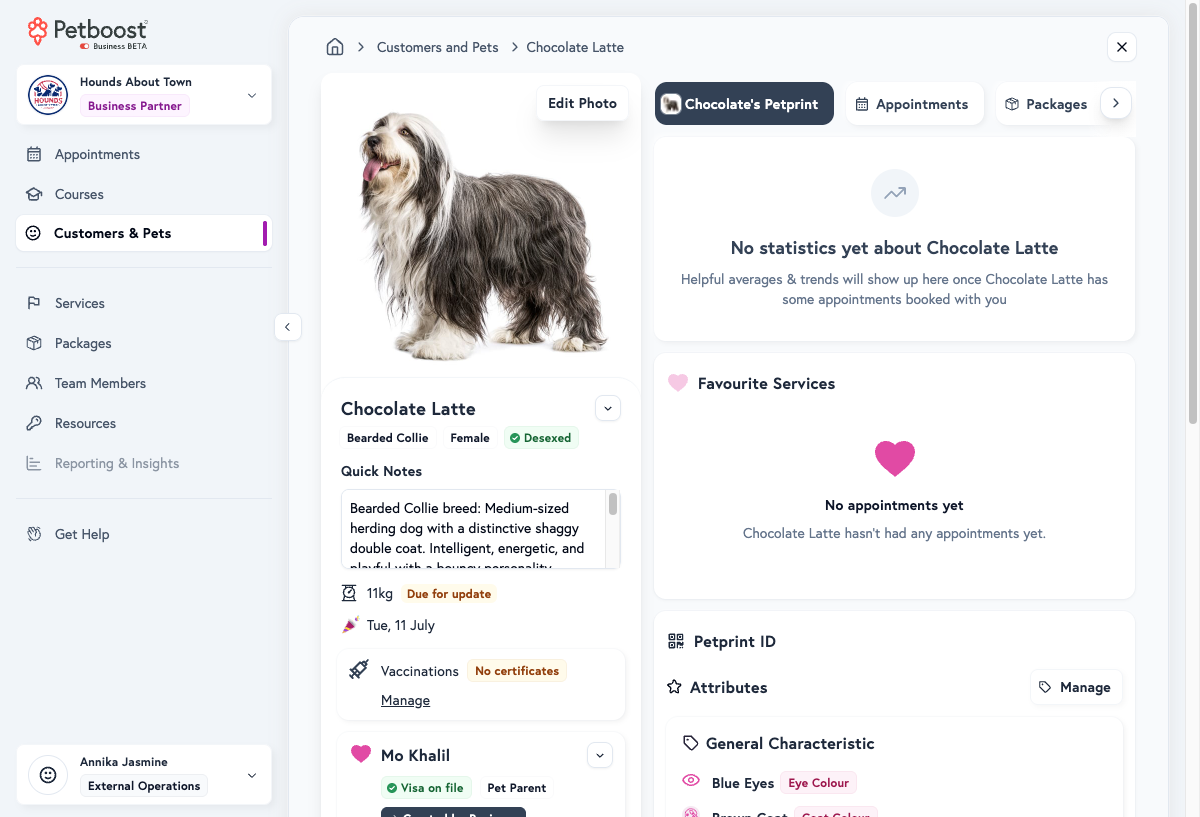
Every pet has a profile, and the owner's details sit on each of their pets' profiles. A change to the owner's details applies to every pet on the account. Most changes start from the two menus in the panel beside the tabs: Manage Pet acts on this pet, and Manage Owner acts on the owner and every pet on their account.
Update the owner's details
Update the owner when their name, number, address or vet changes.
- Open Customers & Pets and select Manage on one of the owner's pets.
- Open Manage Owner and select Edit Owner Details.
- In Edit Pet Owner, change the First name, Surname, Phone, Email, Second pet parent phone, Suburb, Address, or the vet under Emergency Contact Details.
- Select Save Owner Details.
The change shows on every pet belonging to that owner.
Edit the pet's details
Edit the pet when its details change or were entered wrongly.
- Open Customers & Pets and select Manage on the pet.
- Open Manage Pet and select Edit Pet Details.
- Change the Pet Name, Breed, Gender, Birthday, Desexed?, Weight (kg) or Height (cm).
- Select Save Pet Details.
Birthday is used for age-based service eligibility. If a service has an age restriction, a pet with no birthday recorded cannot book it until one is added. Weight (kg) and Height (cm) are used for weight-based service eligibility.
Once a birthday is saved, the profile shows a date-of-birth badge next to the pet's name, on the pet's summary card and in the family pet list. The badge face is the age in years, months and weeks. Tap it to see the full breakdown in years, months, weeks and days, and the date of birth. You do not need to open Edit Pet Details to read the age.
Add Quick Notes
Quick Notes sit in the panel beside the tabs, and every team member sees them.
- Open Customers & Pets and select Manage on the pet.
- Type in Quick Notes, in the panel beside the tabs.
- Select Save. Discard drops the change.
Quick Notes suit behaviour ("Nervous around loud noises"), special handling ("Prefers female groomers"), medical conditions or allergies ("Allergic to chicken"), diet, and how the owner likes to be contacted.
Change the pet's photo
A clear photo helps your team tell pets apart, especially in families with more than one pet of the same breed.
- Open Customers & Pets and select Manage on the pet.
- Select Edit Photo on the pet's photo, or open Manage Pet and select Edit Pet Photo.
- In Update [pet name]'s Profile Photo, select Click to upload, or drag a photo onto it.
- Drag to frame the photo in the square crop.
- Select Save Photo.
Use a clear, well-lit photo that shows the pet's face. The crop is square and suggests 800x800 pixels. Photos can be JPG, PNG, GIF, WebP or HEIC, up to 10MB. To remove the photo, remove it under Profile Photo in Edit Pet Details and select Save Pet Details.
Keep the weight up to date
The pet's weight shows in the panel beside the tabs. Once it was last changed more than 28 days ago, or has no update date, a Due for update badge appears beside it.
- Open Customers & Pets and select Manage on the pet.
- Open Manage Pet and select Edit Pet Details.
- Enter the new Weight (kg).
- Select Save Pet Details.
When any of your services has a weight restriction, Edit Pet Details shows Weight Recommended, Weight Due for Update or Weight Up to Date above the fields.
Tip
Weigh the pet at each visit, so weight-based eligibility stays accurate.
Add vaccination records
The Vaccination Certificates card sits on the [Pet name]'s Petprint tab.
- Open Customers & Pets and select Manage on the pet.
- On the [Pet name]'s Petprint tab, find Vaccination Certificates and select Add Vaccination Records. When the pet already has certificates, select Edit.
- Under Add Certificate, upload the vaccination certificates or titer test results. You can take a photo of the certificate, upload from your device, or select several files at once.
- For each certificate, enter Certificate Label, Date Administered and, if you have it, Expiry Date (Optional).
- Select Save Vaccination Records.
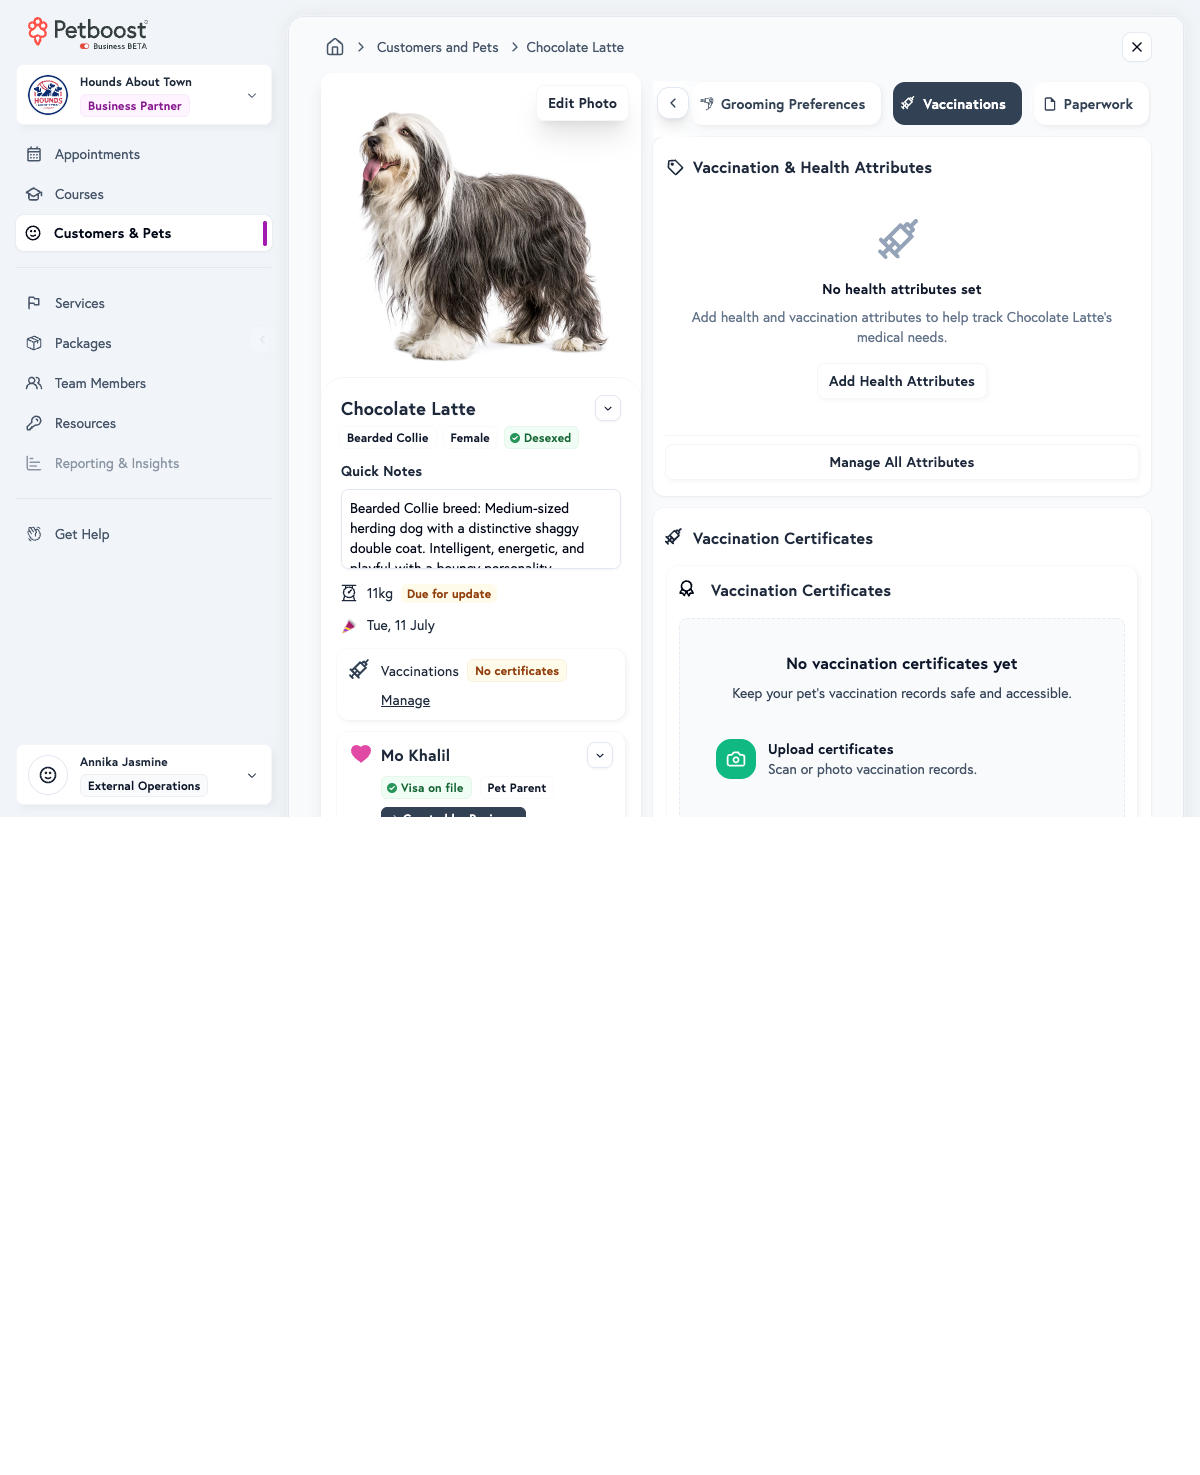
Manage on the Vaccinations row of the pet's summary card opens the same records. From there you can download a certificate and see each expiry date.
The badge on the summary card reads:
- No vaccinations: none uploaded yet
- Vaccinations current: every certificate is in date, or has no expiry date
- Vaccinations expiring: a certificate expires within 30 days
- Vaccinations expired: every certificate has expired
Review a vaccination certificate
If your business requires certificate approval, a certificate the owner uploaded shows Awaiting review until you decide.
- Open Customers & Pets and select Manage on the pet.
- On the Vaccination Certificates card, select Review vaccination certificate.
- Fill in Vaccine / label and Administered date, then select Approve vaccination.
- To reject it instead, select Reject, enter the Reason for rejection, then select Reject & notify owner.
You can decide in Edit Vaccinations too: open it with Manage on the Vaccinations row or Edit on Vaccination Certificates. Enter Certificate Label and Date Administered, then select Approve, which stays disabled until both are filled. To reject, select Reject, type the reason, such as illegible, wrong document or expired, and select Reject & notify.
Approved or Rejected then shows on the certificate. When you reject, Petboost emails and texts the pet owner so they can upload a new one. See Vaccination certificate rejected.
Add health and behaviour attributes
Attributes record the pet's health, allergies, behaviour and appearance on the [Pet name]'s Petprint tab.
- Open Customers & Pets and select Manage on the pet.
- On the [Pet name]'s Petprint tab, type in Search attributes… on the Petprint card.
- Select an attribute to add it. Select it again to take it off.
Each change saves as you make it. The Petprint shows attributes in rows, such as Temperament, Health, Allergies, Dietary, Medications, Treats and Coat colour. When the attribute you want is not in the library, select Create custom attribute.
Set up grooming templates
Grooming templates keep detailed grooming instructions on the pet, so every groom is consistent. The Care & Grooming Templates tab shows when your business offers grooming.
- Open Customers & Pets and select Manage on the pet.
- Open the Care & Grooming Templates tab and choose Preferences.
- Under Grooming Templates, type notes in Head and Face, Body and Tail and Feet and Legs, and add photos under Photos & Attachments.
- Select Save & Publish.
What each area is for:
- Head and Face: ear trim, face style, sensitivity notes and face reference photos
- Body and Tail: body coat length, tail preferences and profile photos
- Feet and Legs: leg trim style, paw preferences, nail care and paw photos
Tip
Reference photos stop miscommunication and keep results consistent.
Grooming Preferences, on the same Preferences view, holds grooming attributes, such as a #7f blade or a 6mm comb. These attributes are the same ones the Petprint tab shows.
Record insurance and the microchip
The Identification & Insurance card on the [Pet name]'s Petprint tab holds the Microchip Number and the pet insurance: the provider, the Policy Number and the Policy Expiry.
- Open Customers & Pets and select Manage on the pet.
- On the [Pet name]'s Petprint tab, select Edit on Identification & Insurance.
- In Edit Pet Details, enter the Microchip Number, Pet Insurance Provider, Pet Insurance Policy Number and Pet Insurance Policy Expiry Date.
- Select Save Pet Details.
Select the Microchip Number or the Policy Number on the card to copy it.
Tip
Microchip numbers matter for lost pet recovery and for boarding.
See the owner's other pets
Family Pets, in the panel beside the tabs, lists every pet belonging to the owner: the total, each pet's photo, name and breed, and a mark on the pet you are viewing. Select a pet to open its profile.
Add another pet for the same owner
- Open Customers & Pets and select Manage on one of the owner's pets.
- Select Add Sibling Pet under Family Pets. On the Appointments tab, New then New Sibling Pet does the same.
- Enter the new pet's details. The owner's details are already filled in.
- Select Add Pet.
Tip
Check Family Pets before you create a new customer, to avoid duplicates.
Check a pet's recurring series
Recurring Series, on the Appointments tab, shows every recurring series set up for the pet on one timeline. It is where you find out how recurring appointments interact and fix problems such as cancelled appointments reappearing.
- Open Customers & Pets and select Manage on the pet.
- Open the Appointments tab and choose Recurring Series.
From here you can:
- See every active, ended and cancelled series in one place
- Scroll a timeline that shows how series overlap across days
- Spot duplicate or dormant series that could cause unintended bookings
- End or deactivate a series from the timeline
- Select a day for the appointments on that date
Use it when a cancelled recurring appointment keeps coming back, when you are unsure how many series are active for a pet, to tidy up old series that were never ended, or to check that an old series closed when you change a pet's schedule. Recurring Series only shows when the pet has a recurring series. For the full guide, see Recurring Series Timeline.
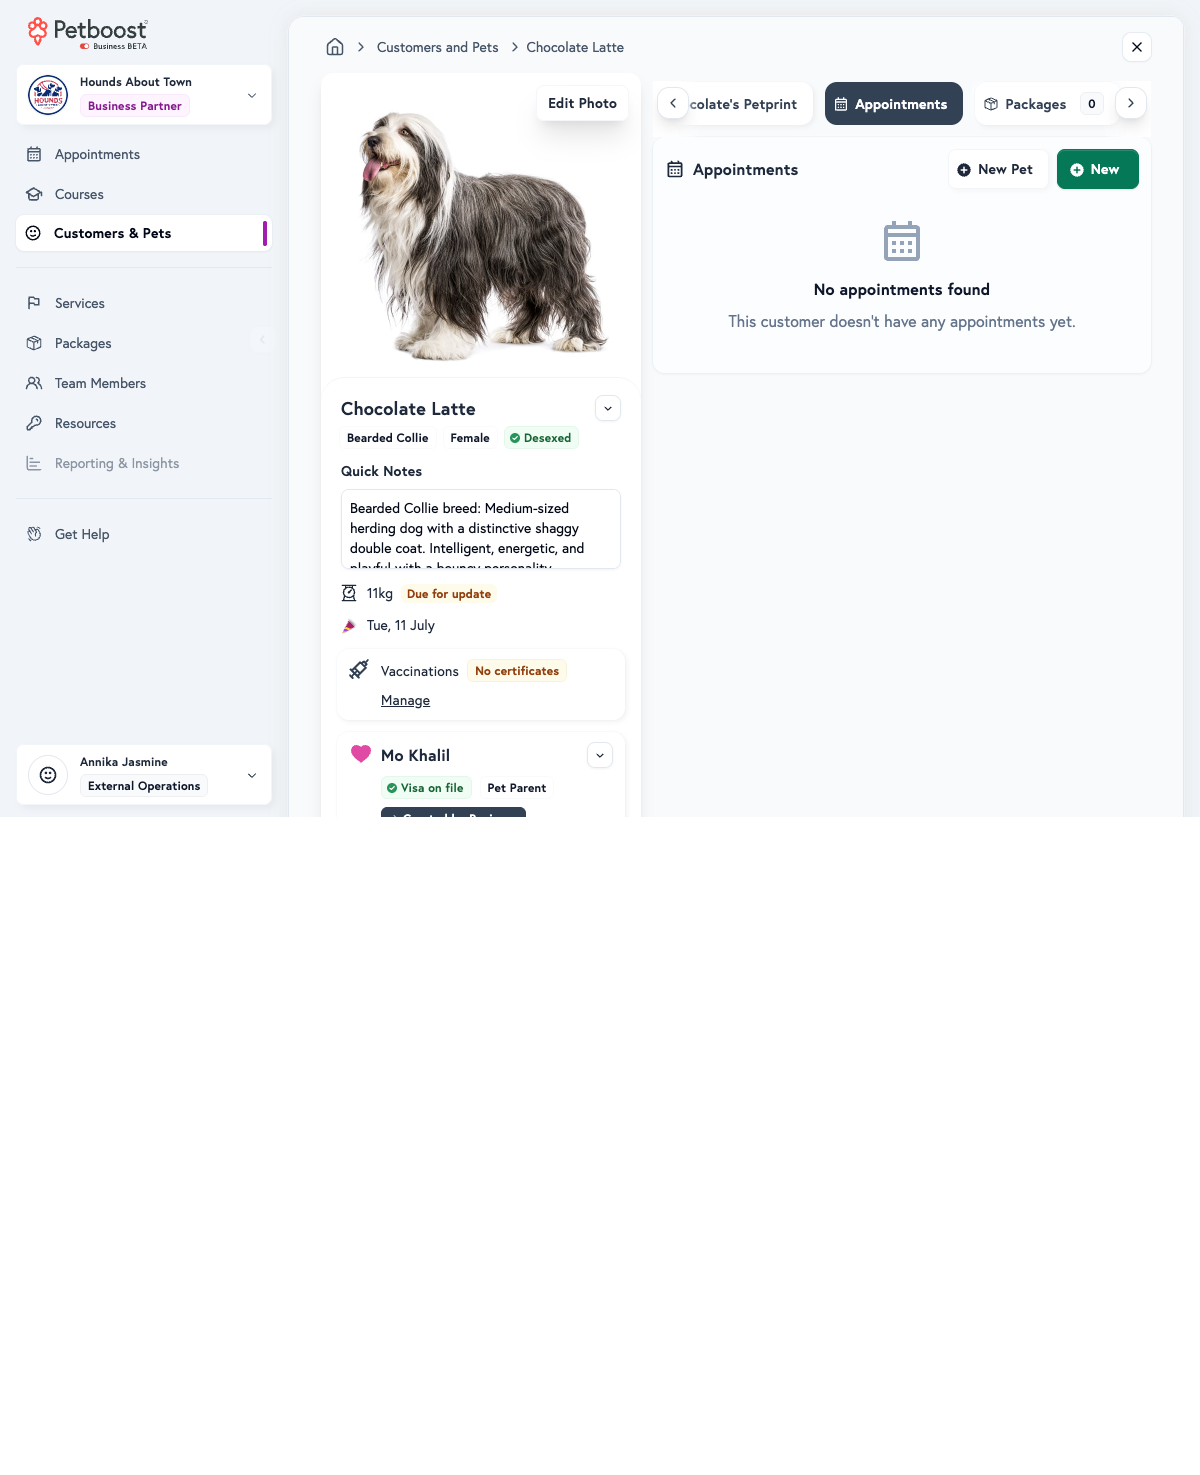
The Appointments tab
The Appointments tab lists the pet's past and upcoming appointments, each with its service and date, team member, status, duration and notes. Select an appointment to open its details and history. New books a new appointment.
See the customer's packages
Packages sit on the Packages sub-tab of the customer's Wallet tab.
- Open Customers & Pets and select Manage on the pet.
- Open the Wallet tab and choose Packages.
Each package shows its name and services, the credits bought and left, and its purchase date and history. New sells the customer another package.
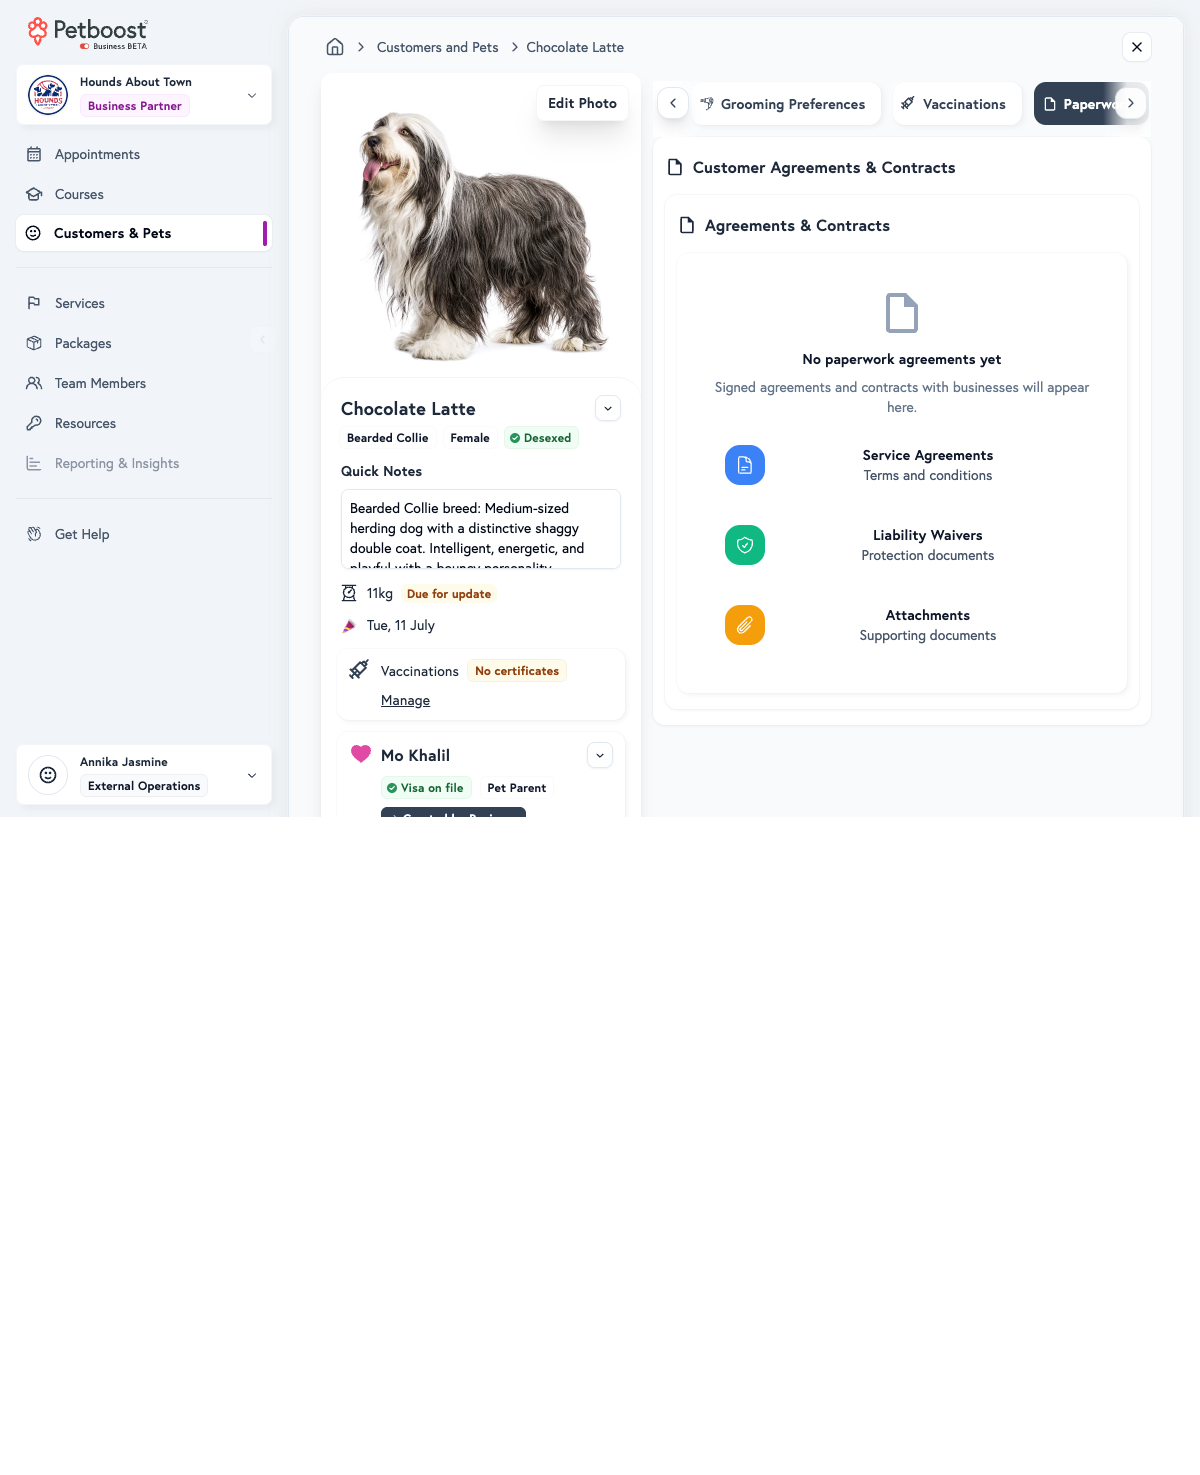
The Paperwork tab
Paperwork holds Customer Agreements & Contracts: service agreements and terms, liability waivers and supporting attachments. Upload signed paperwork, view and download agreements, see when they were signed, and keep documents that belong to one customer.
Ask for a card on file
A customer's card shows on the list, as Card On File, Card Expiring Soon or No Card On File, and in the panel beside the tabs, with the card type, last four digits, expiry date and status. Your team cannot type a card in on the profile. You send the customer a secure link to add it themselves.
- Open Customers & Pets and select Manage on the pet.
- Open the Wallet tab.
- Under Card on File, select Text card request. When the card has expired or is about to, the button reads Text card update.
The button reads Request sent once the text is on its way. It does not show when the customer has no mobile number.
Call or text the owner
On a phone, the panel beside the tabs shows Call and Text buttons carrying the owner's first name.
- Open Customers & Pets on your phone and select Manage on the pet.
- Select Call or Text with the owner's name. Your phone starts the call or opens a message.
Both buttons use the owner's primary phone number. On a computer, select the owner's Phone Number in the panel to copy it.
Block a customer from online booking
Block a customer when you want them to book through you rather than online, such as someone who repeatedly no-shows or cancels late, needs a consultation before booking, or is in a dispute or payment issue.
- Open Customers & Pets and select Manage on one of the customer's pets.
- Open Manage Owner and select Block from Online Booking. It applies straight away.
While they are blocked:
- The customer sees no availability when they try to book a new appointment online
- They can still log in and see their past appointment photos and history, package balances and purchases, their pets' Petprint, grooming preferences, vaccination records, paperwork and agreements
- You can still book appointments for them
- Their existing appointments stay as they are
An amber Blocked from Online Booking banner shows on their profile, on a computer and on a phone.
To let them book online again, open Manage Owner and select Enable Online Booking. They can book online straight away.
Cancel a customer's future appointments
Cancel upcoming Pending or Confirmed bookings for one pet or one owner. The list shows the next 12 months. In-progress, completed, paid and class bookings stay.
This cannot be undone. Cancellation fees are not charged. Package credits on these bookings are kept. You choose whether the customer is notified. If your plan cannot send booking messages, the booking is cancelled silently.
Manage Pet lists bookings that include that pet. Cancelling a shared booking cancels every pet on it. Manage Owner lists upcoming bookings for every pet on that owner account.
From the pet or owner profile
- Open Customers & Pets and select Manage on the pet.
- Open Manage Pet to cancel that pet's upcoming bookings, or Manage Owner to cancel upcoming bookings for the owner.
- Select Cancel Future Appointments.
- Tick the bookings to cancel, or use Select all and the weekday buttons.
- Under Notify customer?, choose whether to notify the customer.
- Select Review cancellation, then Cancel selected bookings.
From Mission Control
If the owner has two or more upcoming bookings, you can start from Mission Control. This list covers every pet on the owner account.
- Open Mission Control and open the appointment card menu on Pets, Workflow, Roster, Photos or Attention Required.
- Select Cancel Future Appointments.
- Tick the rows you want, or use Select all and the weekday buttons, and choose whether to notify the customer.
- Select Review cancellation, then Cancel selected bookings.
To cancel one booking only, select Cancel Appointment instead.
Recurring series end from the next booking, including visits not yet on the calendar, even after the 12-month list. A one-off booking more than 12 months away is not listed. To stop one series without touching the owner's other bookings, open that appointment and choose End series (all future). See How do I cancel recurring appointments in bulk?.
Class and course sessions are not cancelled here. Cancel those from the course enrolment.
Archive or delete a customer or pet
Archiving hides an inactive customer or pet and keeps their records. Deleting removes them permanently.
| Action | What happens | Reversible | Use it for |
|---|---|---|---|
| Archive | Filtered from active views by default, all records kept | Yes | Inactive customers and pets, seasonal clients |
| Permanently Delete | Removed | No | Data removal requests, duplicate clean-up, test records |
Petboost checks what the record holds before it offers either:
| Archive when | Delete when | |
|---|---|---|
| A pet | It has no upcoming or in-progress appointments, and is not the only pet on the account | It has never had an appointment, and is not the only pet on the account |
| An account | It has no upcoming or in-progress appointments. Completed and paid appointments stay in its history | It has never had an appointment, has no unused package credits and no payments waiting to be collected |
If the pet is the only one on the account, archive the whole customer account instead.
Archive a pet
Archiving hides the pet from active lists and keeps all its history.
- Open Customers & Pets and select Manage on the pet.
- Open Manage Pet and select Archive or Delete Pet.
- If the dialog offers a choice, choose Archive.
- Tick the box that starts I want to archive, then select Archive pet.
The pet is filtered from active views by default, and all its appointment history stays. To see archived pets, open Filter on Customers & Pets and set Show Archived Pets to Archived Only or All. Its packages stay but are inactive.
Archive a customer account
Archiving an account hides the customer and all their pets, and keeps their appointments, payments and notes. The phone number stays reserved.
- Open Customers & Pets and select Manage on one of the customer's pets.
- Open Manage Owner and select Archive or Delete Account.
- If the dialog offers a choice, choose Archive.
- Tick the box that starts I want to archive, then select Archive customer account.
The customer and all their pets are filtered from active views by default. Use Show Archived Pets under Filter to see them.
Restore an archived pet or account
- Open Customers & Pets, select Filter and set Show Archived Pets to Archived Only or All.
- Select Manage on the pet.
- On the banner at the top of the profile, select Restore pet or Restore customer account.
A pet marked as passed away has no Restore pet on its banner.
Delete a pet or account permanently
Trap
A permanent delete cannot be undone. Archive a customer who is simply inactive.
- Open Customers & Pets and select Manage on the pet.
- Open Manage Pet and select Archive or Delete Pet, or open Manage Owner and select Archive or Delete Account.
- If the dialog offers a choice, choose Permanently Delete and read the warning.
- Type
DELETE, tick I understand this cannot be undone, then select Delete pet or Delete customer account.
Deleting an account removes the customer's profile and contact details, all their pets and their Pet Owner App login, if they had one. Financial records such as invoices and payments are kept anonymised, with audit logs for compliance. The phone number is freed only when the profile was created from your business and the owner has not signed up in the app.
For a GDPR data deletion request, record when and how the request was made, export the customer's data first if they want a copy, delete the account permanently, then tell the customer it is done. For an inactive customer who may come back, archive instead.
Resend the account activation
If a customer did not receive their Pet Owner App activation:
- Open Customers & Pets and select Manage on one of the customer's pets.
- Open Manage Owner and select Resend Activation SMS.
Resend Activation SMS only shows while the customer has not accepted your terms.
Reset customer password / quick login
This is for a pet owner's Pet Owner App login. To change a staff or owner password for business.petboost.com, use Send Password Reset on the team member profile. See Change your account password.
To help a customer back into their Pet Owner App, or to finish signing up:
- Open Customers & Pets and select Manage on one of the customer's pets.
- Open Manage Owner and select Send Quick Login SMS.
The customer receives a link to log in, and can reset their password from there if they need to.
Recover an abandoned booking
When a customer started an online booking and did not finish, their profile shows an Action Required tab. Mission Control lists them too, under Abandoned bookings.
- Open Customers & Pets and select Manage on the pet.
- Open the Action Required tab.
- On the Abandoned Booking card, choose what to do.
- Create Appointment finishes the booking yourself from the draft details
- Send Recovery Message sends the customer an SMS nudge, and needs the Communications Booster or SMS messaging
- X-Ray this booking plays the recording of the session where they started the booking and left. If Booking X-Ray Booster is off, it opens the Booking X-Ray Booster page, where owners and admins can turn it on. See Watching an unfinished booking
- Dismiss clears the card
There is no separate "resend registration email" button for abandoned bookings. For an unfinished Pet Owner App activation, use Resend Activation SMS or Send Quick Login SMS under Manage Owner instead.
Delete an abandoned booking
You can delete an abandoned booking. Draft pets do not block this.
If the person never finished signing up, a new incomplete sign-up on the ribbon:
- Open Customers & Pets and select Manage on the card in the ribbon.
- Select Delete, then Delete permanently.
Petboost removes the draft owner account, its pets and the abandoned booking data. In Mission Control, you can also select Abandoned bookings, tick the cards under Abandoned Bookings (New) or Unfinished Profiles, and select Delete.
If the card is still on the ribbon after the delete, refresh the page. Do not select Delete again: the first delete already succeeded.
If the person is already a customer and left a new booking unfinished:
- Open Mission Control and select Abandoned bookings.
- Under Abandoned Bookings (Existing), tick the cards.
- Select Dismiss.
You can also open their pet's profile, open the Action Required tab and select Dismiss on the Abandoned Booking card.
That clears the unfinished booking and keeps the customer. Do not use Manage Owner > Archive or Delete Account for this: appointment history on an existing customer blocks a permanent account delete, and it is a different action from deleting a new incomplete sign-up.
Watching an unfinished booking
To watch what a customer did before they abandoned a booking, turn on Booking X-Ray Booster and open the recording from their Abandoned Booking card.
The add-on needs a Pro, Flex or Max plan. It is not available on a trial or on Calendar Lite. Owners and admins activate it from Billing, then Plan & Power-Ups, or from the Abandoned Booking card itself.
- Open Customers & Pets and select Manage on the pet.
- Open the Action Required tab.
- On the Abandoned Booking card, select X-Ray this booking.
The recording plays in a dialog. X-Ray this booking appears only when a recording was captured for that booking.
If Booking X-Ray Booster is off, X-Ray this booking opens the Booking X-Ray Booster page with the price and Activate X-Ray Booster. After you activate, select Watch this booking to play that booking's recording. It can take a few seconds to switch on.
You can also open a recording from the Health Board: select an abandoned-booking card, then X-Ray this booking. In Mission Control, abandoned bookings with a recording show X-Ray ready.
Each Watch recording opening uses one of 15 included views per billing cycle. A multi-location organisation shares the 15 views across all of its locations. Unused included views do not roll over. After 15, each extra view is charged on your next invoice at the price the Booking X-Ray Booster page shows. The dialog asks you to confirm before an extra view plays. Rewatching a recording in the dialog you already opened does not use another view. The count resets with your billing cycle.
Recordings are kept for 90 days from the date the booking was abandoned. After that the button shows Recording expired.
Recordings cover your own booking page and your own customers only. What the customer typed into the form is visible, so you can see the field they got stuck on. Card details are entered in a separate secure payment frame and are never recorded.
New customers tick a box agreeing to Petboost's Terms of Service and Privacy Policy before their booking is saved. The Privacy Policy tells them that a business they start a booking with can see what they were trying to book and how they used the booking page.
Related FAQs
- What does "draft" status mean for a customer or pet?
- Can I delete an abandoned booking?
- Why isn't a phone number search finding my customer?
- Can siblings have the same name as another pet in the system?
- How do I mark a pet as deceased?
- Can I reactivate a pet marked as deceased?
- How do I know when vaccinations are expiring?
- How do I see all vaccination certificates for a pet?
- How do I require proof of vaccination before customers can book?
- Why is weight tracking important for my business?
- How do I update a pet's weight?
Related articles
- Pet & Owner Profiles: the profile tabs, including per-customer policy overrides
- Recurring Series Timeline: manage, audit and clean up recurring series from the pet profile
- Getting Started with Customers & Pets: adding customers and finding your way around
- Pet Attributes: the 1,600+ pre-built attributes for care, health and behaviour
- Customers & Pets FAQ: common questions answered
Need help? Contact support or select Get Help in your dashboard to chat with our team.