
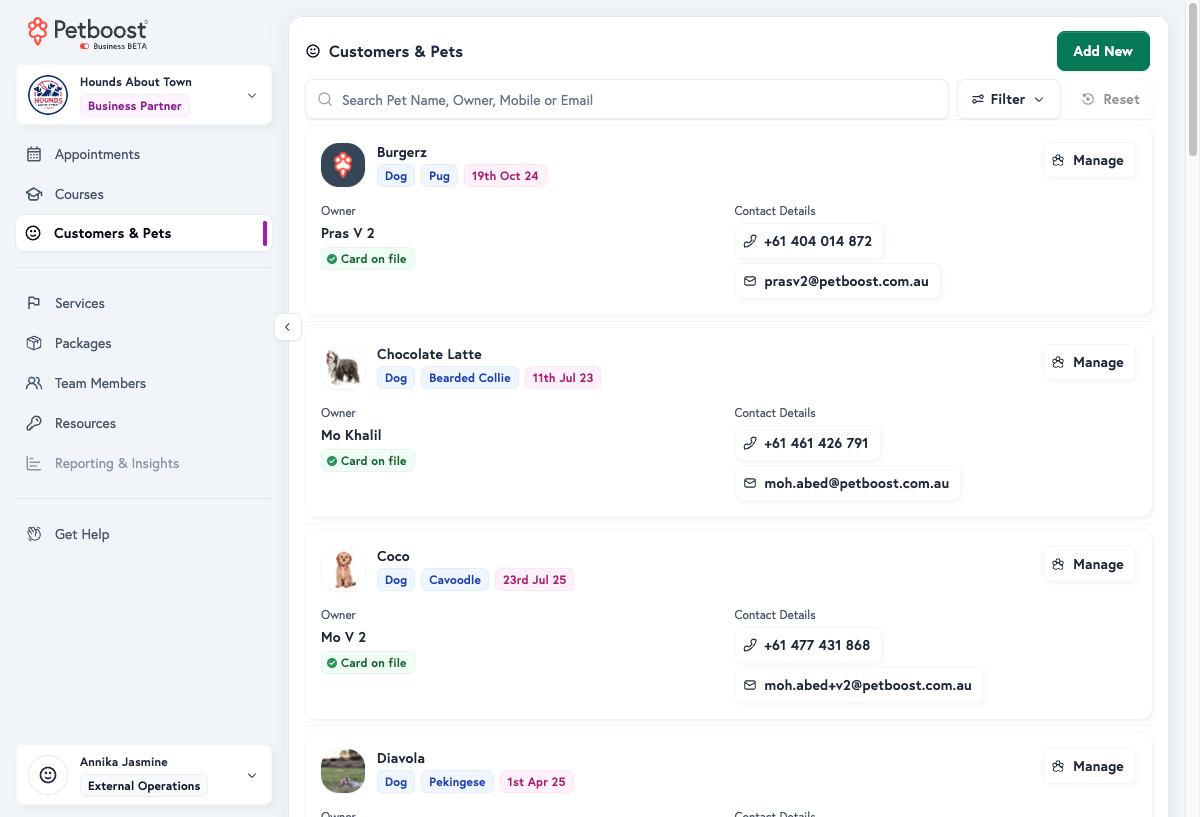
Petboost creates a customer and their first pet together, in one form, and every pet belongs to a customer. The list on Customers & Pets shows one card per pet, with the owner's details on it, and Manage on a card opens that pet's profile.
Find a customer or pet
Use the search, the sort and the filters when you want one record or a group of them.
- Open Customers & Pets.
- Type a pet name, owner name, mobile number or email in the search box. Results appear as you type.
- To change the order of the list or group its rows, select Sort & Group. Your choice stays in this browser.
- To narrow the list, select Filter and choose under Show Archived Pets, Online Booking, Payment Status, Membership, Pet Type, Tags, Attributes, Custom Fields, Appointment History, No Booking Since or Breed.
- To clear the search, the filters and the sort in one go, select Reset.
Each pet card shows the pet's photo, name, breed and birthday, and the owner's name, contact details and card on file status. On the profile, the birthday badge shows the pet's age in years, months and weeks. Tap it to see the full breakdown and the date of birth.
Partial names work, so searching "Choc" finds "Chocolate". Phone numbers match with or without spaces, and email searches are not case-sensitive. Membership appears under Filter when you sell memberships.
Add a customer and pet
Add a customer when they first book with you or first get in touch. The owner and their first pet are saved together.
- Open Customers & Pets and select Add New.
- Under Create Pet Owner and Pet, enter the owner's First name, Surname and Phone. Email is optional.
- Optional: open Add Additional Details for Second pet parent phone, Suburb, Address and Emergency Contact Details, which holds the vet or clinic name and phone.
- Under Pet 1 Details, enter the Pet Name and choose the Breed and Gender.
- Optional: open Additional Pet Details for Birthday, Desexed?, Weight (kg), Height (cm), Microchip Number, the pet insurance fields, Profile Photo, Coat Colour and Instagram Username.
- To add another pet for the same owner, select Add another pet.
- Under Notify customer?, choose Send notification or Create silently.
- Select Create & Send Activation SMS or Create Silently. The pet's profile opens.
The button reads Complete Required Fields until you enter a phone number, and Choose whether to notify customer until you answer Notify customer?. If the number already belongs to a customer, Existing customer appears with Open profile: add the pet on that profile instead of creating a new customer. Switch on Create another customer & pet afterwards to keep the form open for the next one.
Add New Customer & Pet opens the same form directly. You can bookmark the link, share it, or link to it from another system, and the browser's back and forward buttons work with it.
Tip
To add a pet to an existing customer later, open one of their pets and select Add Sibling Pet under Family Pets.
Start an intake
Start Intake opens New Customer Intake, a six-step form for adding an owner and pet in one sitting.
- Open Customers & Pets and open the gear menu beside Add New.
- Select Start Intake.
- Complete Owner, then select Next.
- Complete Pet, then select Next.
- Complete Vet, Vaccinations and Notes as needed, selecting Next after each.
- On Review, select Save Customer.
Select Exit to return to Customers & Pets without saving.
Open a pet's profile
Every pet has its own profile, and the owner's details sit on it.
- Open Customers & Pets and select Manage on the pet.
- Choose a tab. When the tabs do not all fit, use the arrow buttons at each end of the row to scroll them.
These tabs always show: [Pet name]'s Petprint, Pet & Owner Details, Wallet, Appointments, Timeline & Notes, Sales, Fields & Forms, Settings & Overrides and Paperwork. Action Required, Messages and Care & Grooming Templates show only when they apply.
The Petprint tab
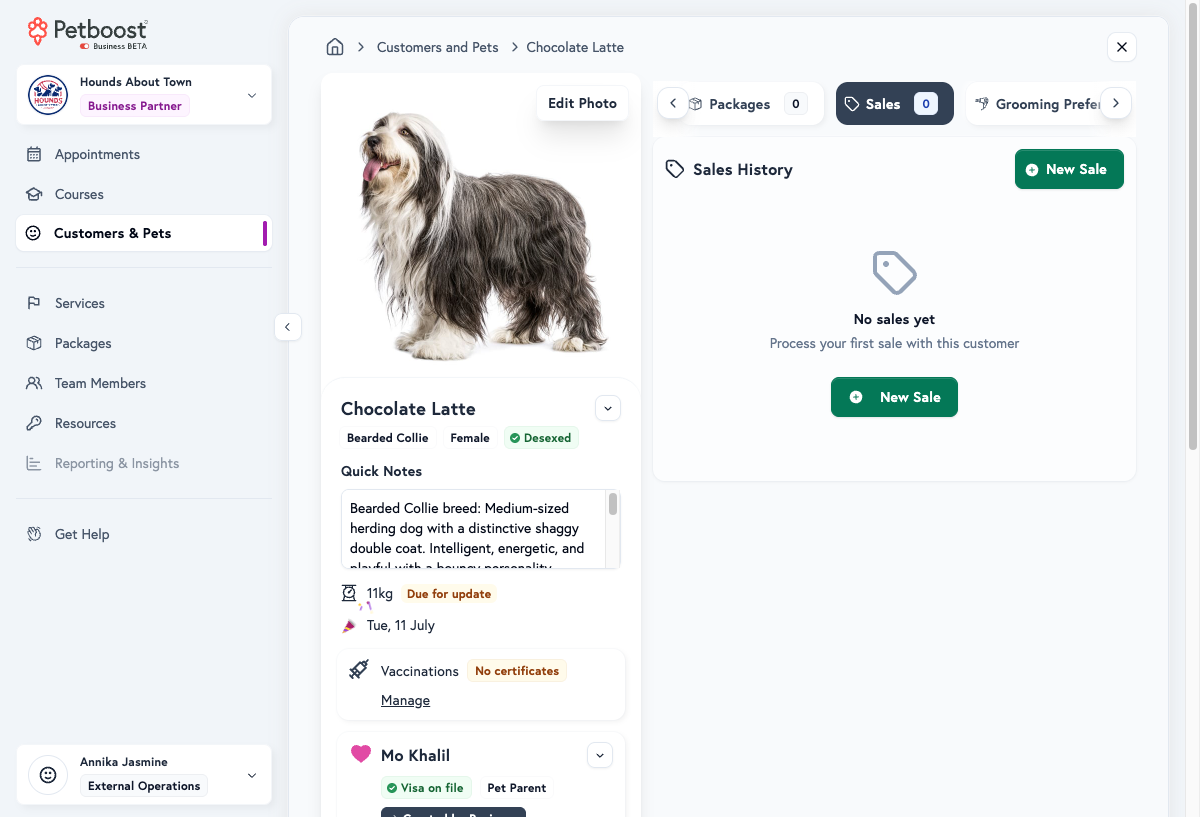
[Pet name]'s Petprint holds the pet's attributes, such as temperament, health, allergies, diet, medications, treats and coat colour, with its tags, Microchip Number and insurance Policy Number, its favourite services worked out from its bookings, Pet details and Photos.
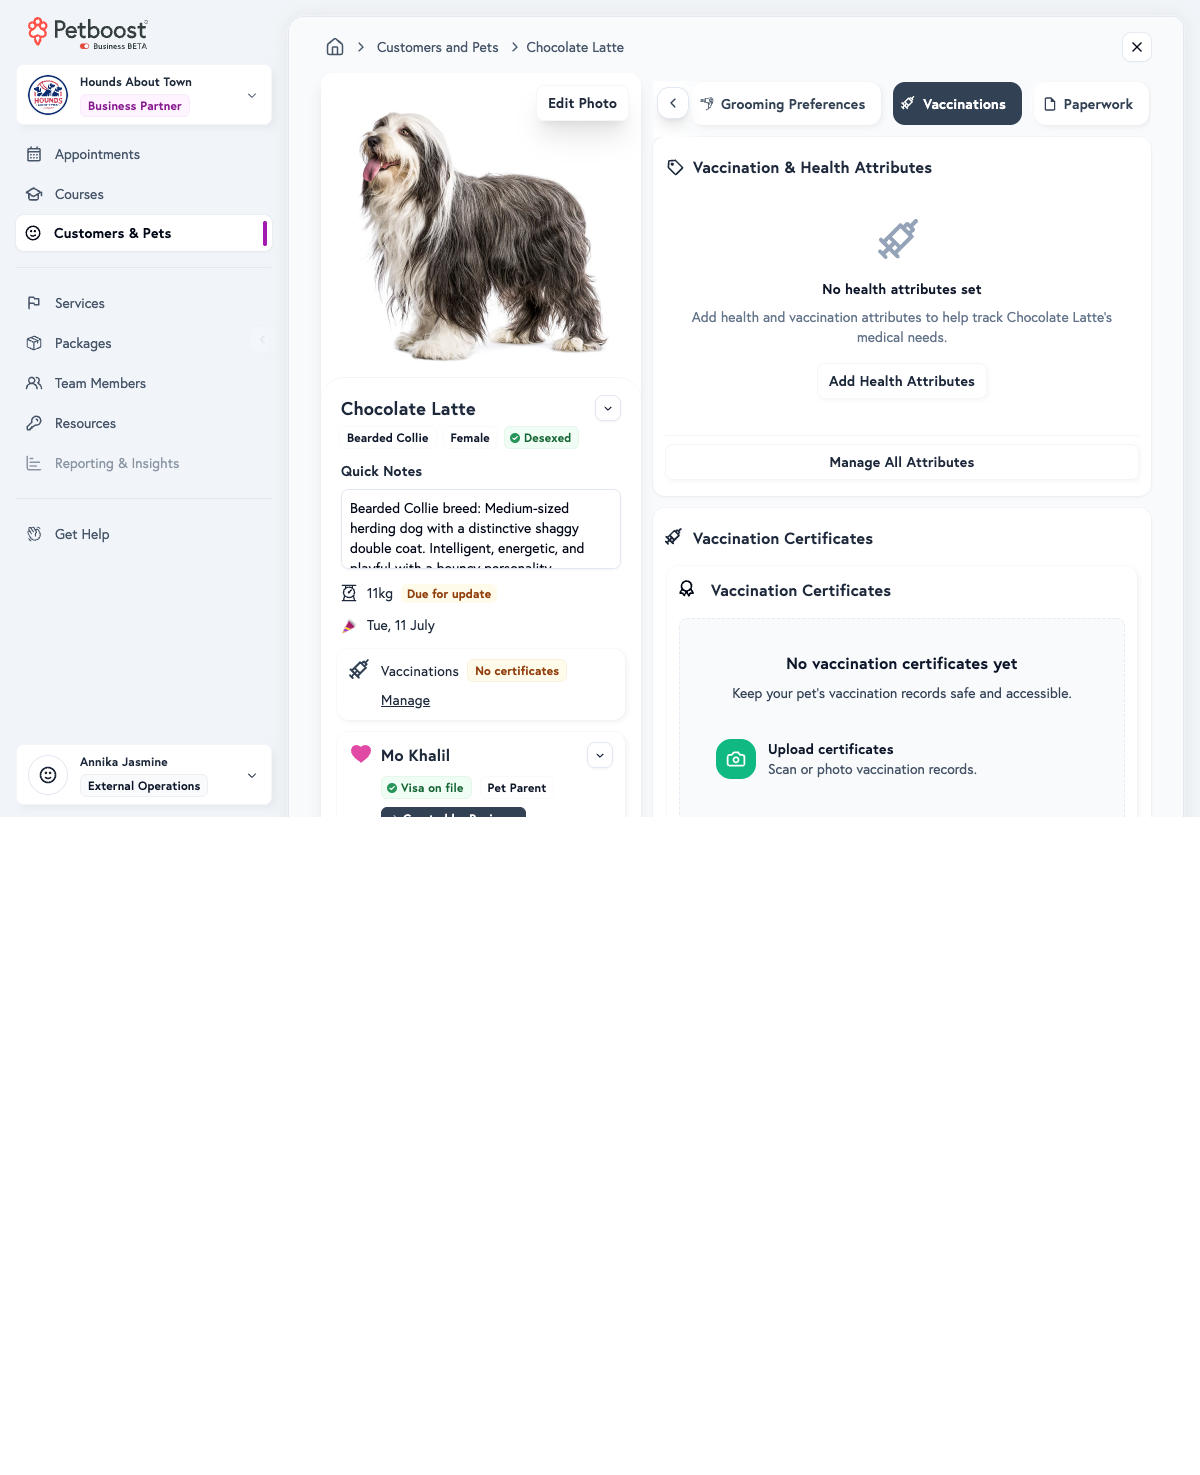
The Vaccination Certificates card sits on this tab too. Vaccinations are not a separate tab.
- Upload a certificate with Add Vaccination Records
- Track each vaccination's dates
- To remind owners before a vaccination expires, switch on Vaccination Expiry Reminders in Settings, then Notifications
The Appointments tab
Appointments lists the pet's past and upcoming appointments. New books a New Appointment or a New Recurring Appointment for the pet. When the pet has a recurring series, Recurring Series sits beside Appointments at the top of the tab.
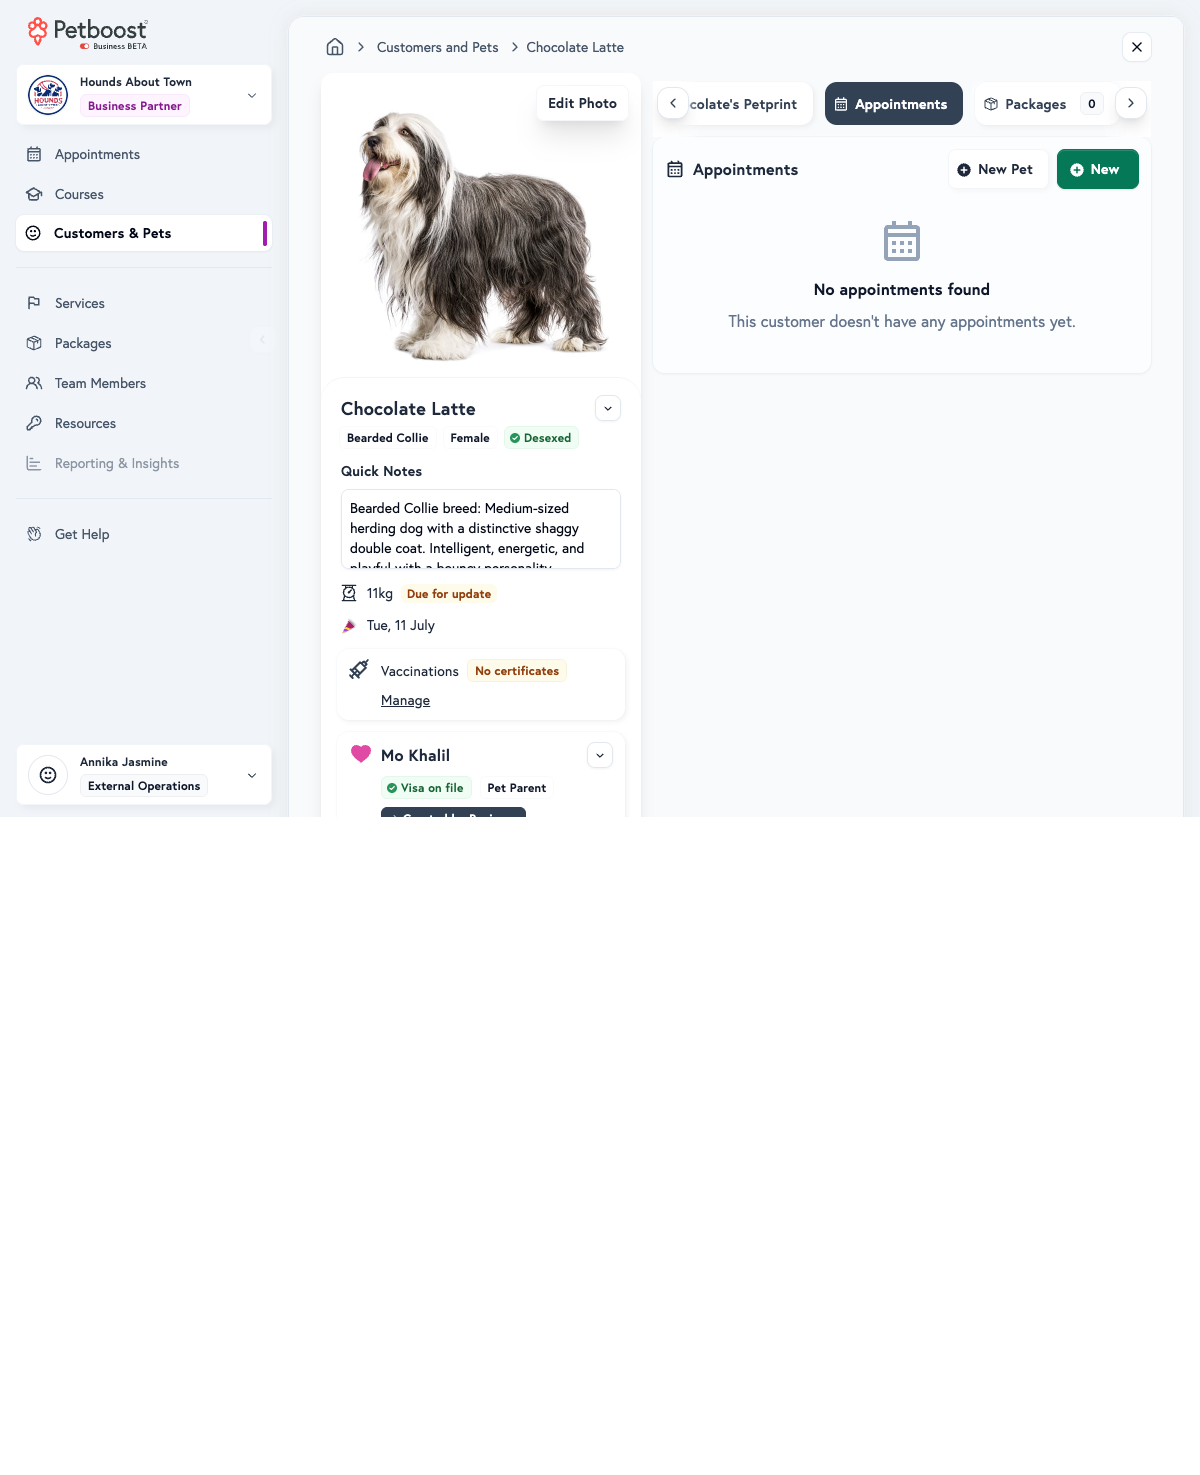
See the customer's packages on the Wallet tab
The Wallet tab holds the customer's payments, packages and memberships. It is named Wallet, Wallet & Packages, Wallet & Memberships or Wallet, Packages & Memberships, depending on what you sell.
- Open Customers & Pets and select Manage on the pet.
- Open the Wallet tab and choose Packages.
Packages shows each package the customer bought, the credits left and a button to sell another.
The Sales tab
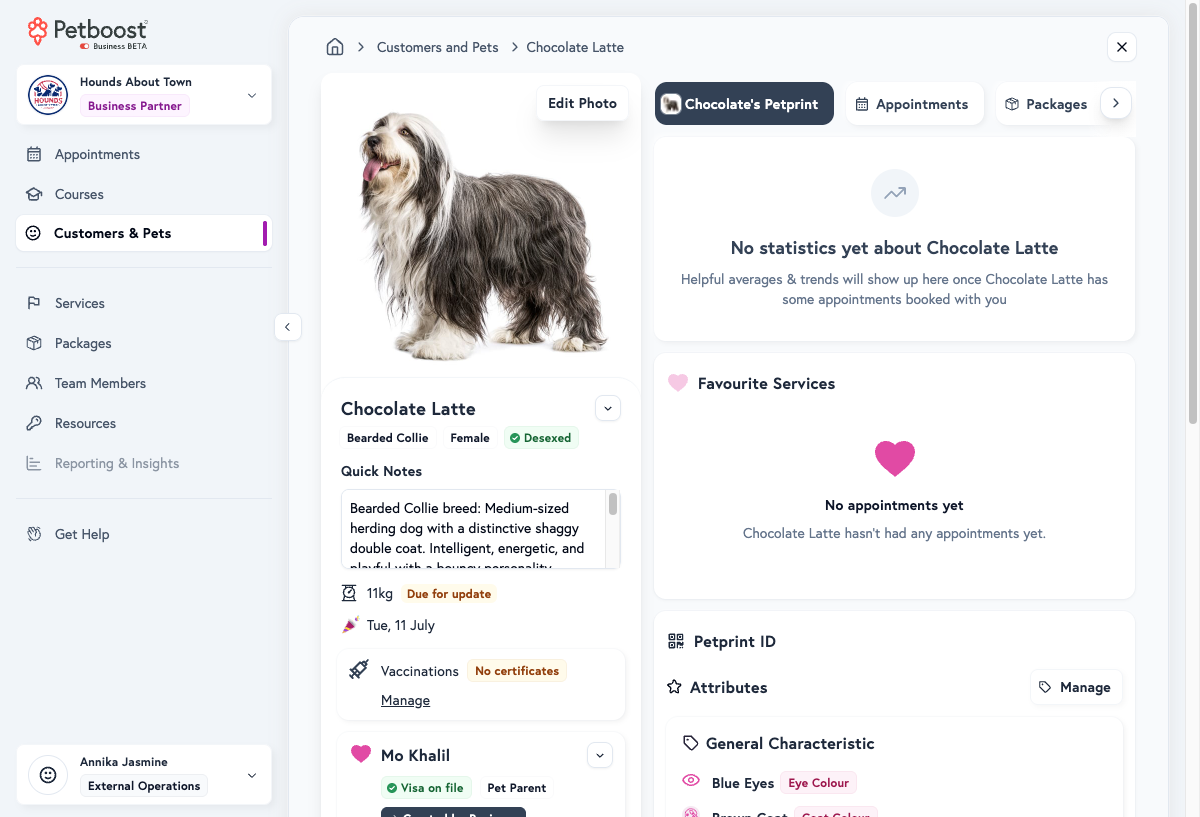
Sales holds the customer's transaction history: product and service purchases and payment records.
Keep grooming preferences on Care & Grooming Templates
Care & Grooming Templates shows when your business offers grooming. Preferences kept here stay on the pet, so they are there for whoever does the next groom.
- Open Customers & Pets and select Manage on the pet.
- Open the Care & Grooming Templates tab and choose Preferences.
- Under Grooming Templates, fill in Head and Face, Body and Tail and Feet and Legs.
- Select Save & Publish.
Each area holds its preferences, reference photos and special instructions. Preferences also holds the pet's Coat Type and Grooming Preferences, and History lists past grooms.
The Paperwork tab
Paperwork holds Customer Agreements & Contracts: service agreements, liability waivers, signed contracts and supporting documents.
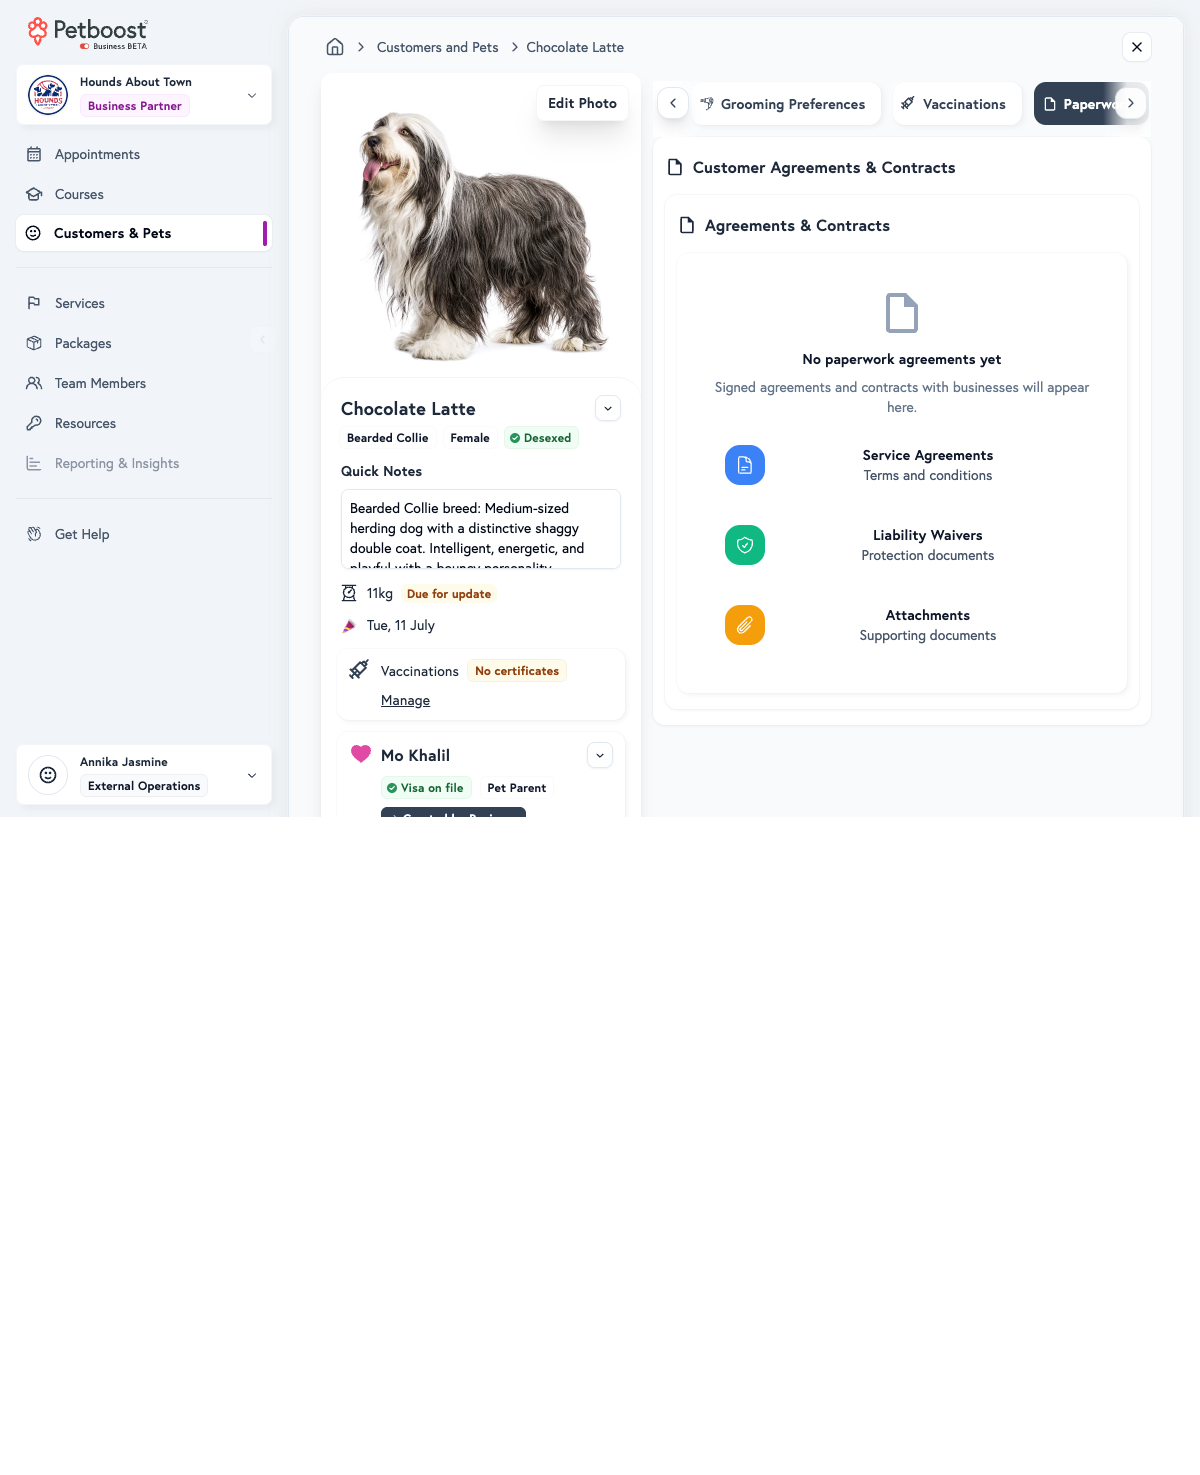
What the sidebar shows
The panel beside the tabs holds the pet and the owner at a glance.
| Card | What it shows |
|---|---|
| The pet | The pet's photo with an edit button, name, breed and gender, desexed status, Quick Notes, current weight and when it was last updated, and birthday |
| The owner | The owner's name with an edit button, phone number, the second pet parent's number with its label, such as Partner, email, address, card on file status and the stored payment method. On a phone, Call and Text buttons carry the owner's first name |
| Emergency Contact | The vet or clinic name and phone number from the owner's details, or Not set with Add |
| Family Pets | Every pet on this owner's account, the total count and a link to each one. Archived pets sit under Archived, and Add Sibling Pet adds another pet to the account |
The sidebar also holds the Manage Pet and Manage Owner menus, and the vaccination card.
Bulk edit pet details
Update pet details across many pets at once in a spreadsheet-style grid, such as filling in missing details after an import or tidying records in bulk. Bulk edit needs the Bulk Manage Customers permission and a desktop or laptop computer.
- Open Customers & Pets and open the gear menu beside Add New.
- Select Bulk Edit Pet Details.
- Under What would you like to edit?, keep Show All Pets, or choose one or more of Missing Weight, Missing Birthday, Missing Breed and Missing Desexed Status. Each shows how many pets it covers.
- Select Load All Pets or Load Filtered Pets. The number of pets sits inside the label, such as Load All 120 Pets.
- Edit the cells. Changed cells are highlighted.
- Select Publish Changes in the bar at the foot of the grid.
| Field | Type |
|---|---|
| Pet Name | Text |
| Breed | Searchable dropdown of the breed database |
| Weight (kg) | Number |
| Gender | Male or Female |
| Desexed | Yes or No |
| Birthday | Date |
Owner is shown for reference and cannot be edited in the grid. Undo (Cmd+Z) and Redo (Cmd+Shift+Z) revert and reapply edits, and Discard All reverts every unsaved change. If you leave the page with unsaved changes, Petboost asks you to confirm.
Send bulk email
You email clients from your own email app. Petboost opens a message with your business address in To and the selected clients' addresses in BCC, so clients do not see each other's emails. Sending bulk email needs the Bulk Manage Customers permission.
- Open Customers & Pets and open the gear menu beside Add New.
- Select Send bulk email.
- In Send Bulk Email to Clients from your own email, leave the clients selected, or use Select All or Deselect All.
- Select Open Default Email.
To email a filtered segment instead:
- Open Customers & Pets and open the gear menu beside Add New.
- Select Smart Export.
- On Export Type, choose what to export and select Next.
- On Segment, set your filters and select Next.
- On Preview, under Bulk communication, select Send bulk email.
Send bulk email in Smart Export stays disabled when no client in the segment has an email on file.
Open the Key Dates Calendar
Key Dates Calendar shows the upcoming dates across your customer list.
- Open Customers & Pets and open the gear menu beside Add New.
- Select Key Dates Calendar.
- Switch on the rows you want: Birthdays, Vaccination Expiries, Card Expiries, Insurance Expiries, Pending Appointments and Content Calendar.
- Select a day to see who is on that date.
Export owners and pets together
Quick Export: Combined downloads one CSV row per owner, with up to 10 pets on that row.
- Open Customers & Pets and open the gear menu beside Add New.
- Select Quick Export: Combined.
Quick Export: Pet Owners, Quick Export: Pets and Quick Export: Vaccinations are on the same menu. See How do I export my client list?.
Complete missing fields
Complete Missing Fields walks you through the gaps on one pet's record.
- Open Customers & Pets and open the gear menu beside Add New.
- Select Complete Missing Fields.
- On Pick a Pet, select the pet.
- Select Start Completing Fields.
- Fill in each step and select Save & Next. On the last step, select Save & Finish.
Exit returns to the pet's profile at any point. On Pick a Pet, Back to Customers & Pets leaves without choosing a pet.
Import from other software
Switching from another system? The Data Migration Guide covers importing customers and pets from:
- MoeGo, with a video tutorial on downloading and uploading MoeGo data
- Gingr and PetExec
- Pet Manager
- ProPetWare
- Time to Pet
- Any system with a CSV export
Our onboarding team provides hands-on help during your move.
Draft profiles
Some profiles show a Draft status. These are real records, created when a customer started signing up or booking online and did not finish.
- They show placeholder names such as "[Kiwi] [Owner]" until they are converted
- They are not duplicates. Convert one if you want to keep the customer, and delete it if you want that incomplete sign-up gone
- You convert one to a full profile by completing the required fields: name, phone, pet name, breed and gender
- You can convert a draft inline while you create an appointment, with no separate step
- They are listed in the ribbon at the top of Customers & Pets
Converting a draft keeps everything captured during the partial sign-up, including pet details and any booking data. For the full guide, see the Draft Accounts FAQ.
Delete an incomplete sign-up
You can permanently delete an abandoned booking or an unfinished profile. Draft pets on that sign-up do not block the delete: Petboost removes the draft owner account and its pets together. Convert a draft instead when you want to keep the record.
The ribbon at the top of Customers & Pets lists incomplete sign-ups. Its heading is Incomplete Sign-ups when both types are present, Abandoned Bookings when only abandoned bookings are present, and Unfinished Profiles when only unfinished profiles are present.
- Open Customers & Pets and select Manage on the card in the ribbon.
- Select Delete.
- Read Delete incomplete sign-up?, then select Delete permanently.
That permanently deletes the pet and the owner's draft account, including any abandoned booking data. Select Cancel if you do not want to delete.
The card leaves the ribbon when the delete succeeds. If it is still there, refresh the page. Do not select Delete a second time: the first delete already succeeded.
From Manage you can also select Complete Profile, View, or Reach Out on an abandoned booking with a phone number.
Trap
If the person is an existing customer who started a new booking and left, do not delete their account. In Mission Control, select Abandoned bookings, tick the cards under Abandoned Bookings (Existing) and select Dismiss. See Delete an abandoned booking.
Next steps
- Add your existing customers. Import them from a CSV or add them one at a time
- Upload pet photos. They make profiles easier to recognise
- Add vaccination records. Keep health information current
- Set up grooming preferences. Record what each groom needs
- Add Quick Notes. Record important care instructions
Related FAQs
- What does "draft" status mean for a customer or pet?
- Can I delete an abandoned booking?
- Why isn't a phone number search finding my customer?
- Can siblings have the same name as another pet in the system?
- How do I see all vaccination certificates for a pet?
- What happens to my data in my old system?
- How do I email all my clients?
Related articles
- Managing Customer Profiles: edit customer and pet information, photos and notes
- Customers & Pets FAQ: common questions answered
Need help? Contact support or select Get Help in your dashboard to chat with our team.