
A team member can be a staff member, a contractor or a volunteer. The Team Members list marks each one Bookable when they can take at least one pet at a time and have working hours or at least one service, and Not Bookable when they cannot.
Roles & permissions
Every team member holds one of four roles, and the role decides which pages and actions they can use. There is no permission switch for one person: the role is the only lever.
| Role | Product summary | Suits |
|---|---|---|
| Owner Admin | Full access to everything | Business owner, primary account holder |
| Admin | Full business operations | Business managers, co-owners |
| Service Performer | Appointments and customers | Groomers, trainers, daycare staff |
| Service Supporter | Basic appointment access only | Reception, assistants, trainees |
The table below follows the permissions map Petboost shows under View Full Permissions Map on Roles & Permissions. View only means the team member can open the page and cannot change anything on it.
| Action | Owner Admin | Admin | Service Performer | Service Supporter |
|---|---|---|---|---|
| View, create, cancel and reschedule appointments | Yes | Yes | Yes | Yes |
| Process payments | Yes | Yes | Yes | Yes |
| Export the calendar as CSV or PDF | Yes | Yes | No | No |
| Toggle drag lock on the calendar | Yes | Yes | Yes | No (always on) |
| View courses, enrol pets and move attendees | Yes | Yes | Yes | Yes |
| Create or cancel courses | Yes | Yes | Yes | No |
| Manage course templates | Yes | Yes | View only | No |
| View customer profiles, and create and edit customers | Yes | Yes | Yes | Yes |
| Export customers, Smart Export, bulk email, bulk update settings, import | Yes | Yes | No | No |
| Services, Packages, Products, Team Members, Resources, Schedules & Sessions | Yes | Yes | View only | No |
| Reporting & Intelligence | Yes | Yes | No | No |
| Settings, including booking, payment, notification and policy settings | Yes | Yes | No | No |
| Billing & Subscription | Yes | Yes | No | No |
| Referral Program | Yes | Yes | No | No |
Financial data is hidden on Mission Control for a Service Performer and a Service Supporter.
The Service Supporter role is for team members who help with day-to-day operations and should not touch business configuration, such as reception staff, trainees, assistants and part-time helpers. They can create, cancel, reschedule and update appointments, take payments, enrol pets in courses and move attendees between courses. They cannot create, cancel or reschedule a course, manage course templates, open business settings, or switch off drag lock on the calendar, which stops an accidental reschedule.
Check what each role can do
Open this page when you are deciding which role to give someone, or when a team member cannot see a page.
- Open Roles & Permissions.
- Read the card for the role. It lists what the role can do, what it cannot, and the active team members who hold it.
- Optional: select View Full Permissions Map to see every page and action for all four roles side by side.
Change a team member's role
Change a role when someone's job changes, for example when a trainee starts taking their own bookings.
- Open Team Members and select Manage on the team member.
- Choose Personal Details.
- Under Role, choose the new role.
- Select Publish Changes, tick the box in Before You Publish, then select Publish Changes.
The new role applies once you publish it. The team member may need to refresh their browser to see the new permissions.
When you add a team member, only an Owner Admin can give the Admin role. Anyone else adding a team member can choose Service Performer or Service Supporter, and nobody can add a second Owner Admin.
Add a team member
Add a team member for each person who takes bookings, even if they will never sign in.
- Open Team Members, select Add New, then New Team Member.
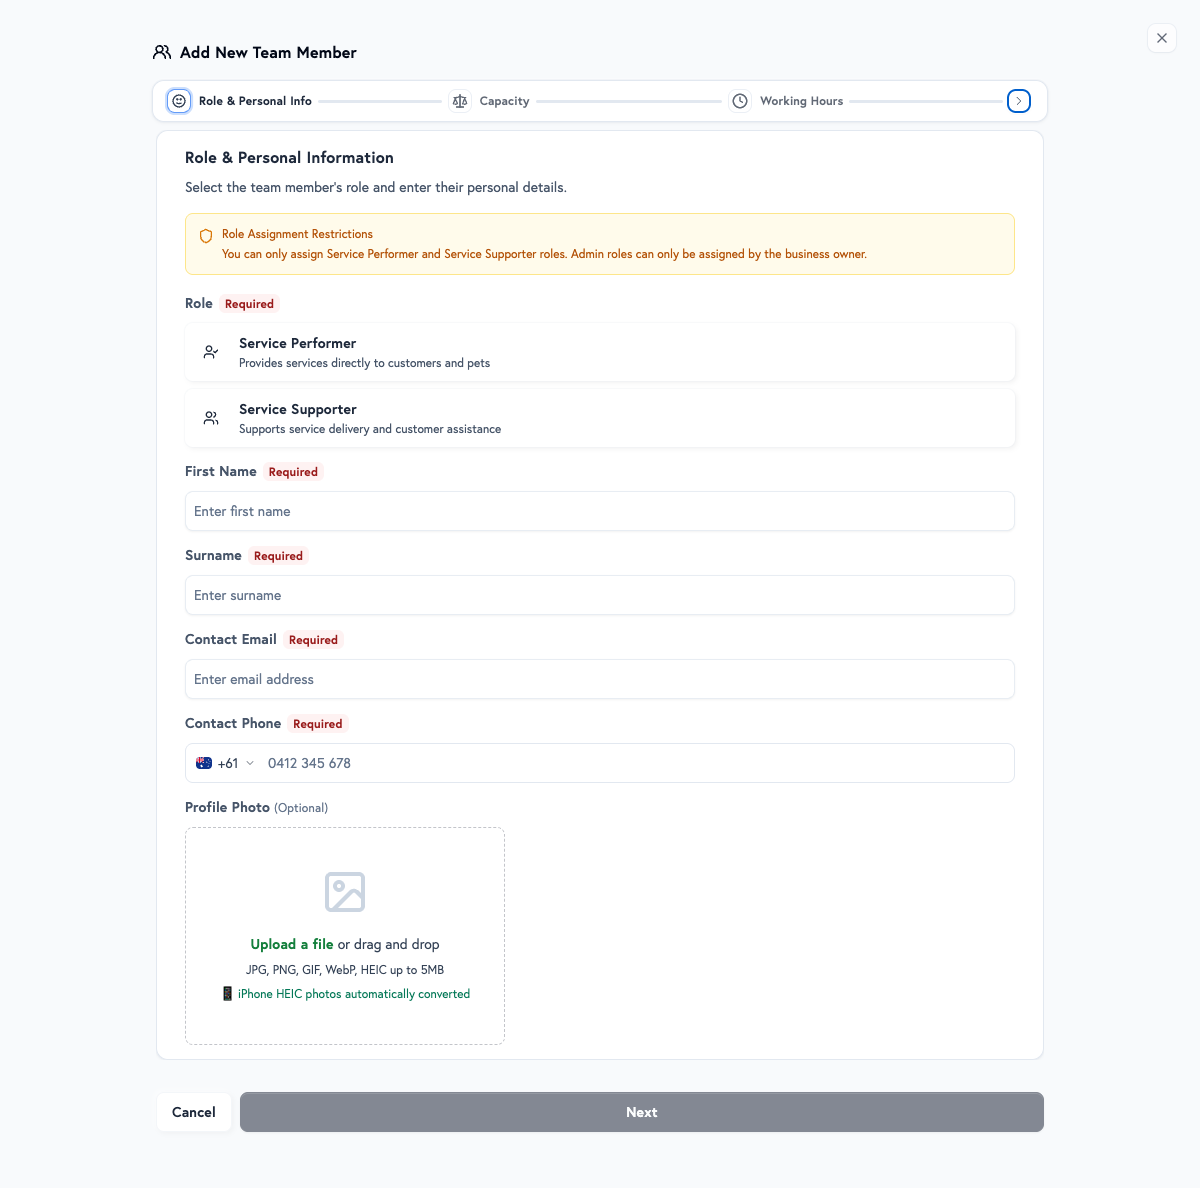
- On Role & Personal Info, choose the Role.
- Enter First Name, Surname and Contact Email.
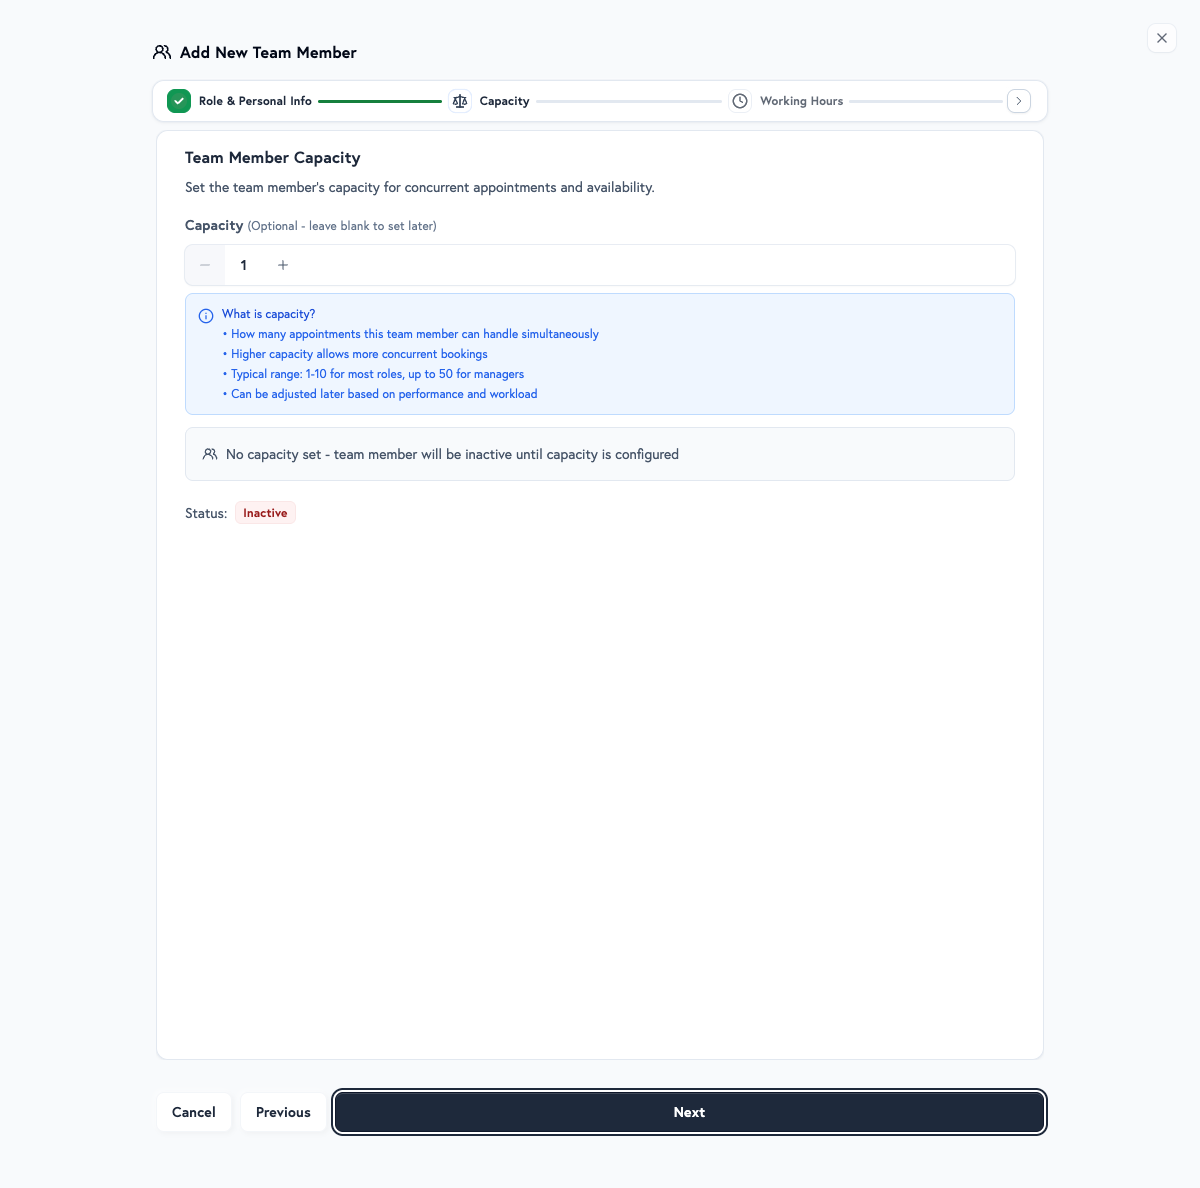
- Select Next. On Capacity, set how many appointments this person can handle at the same time.
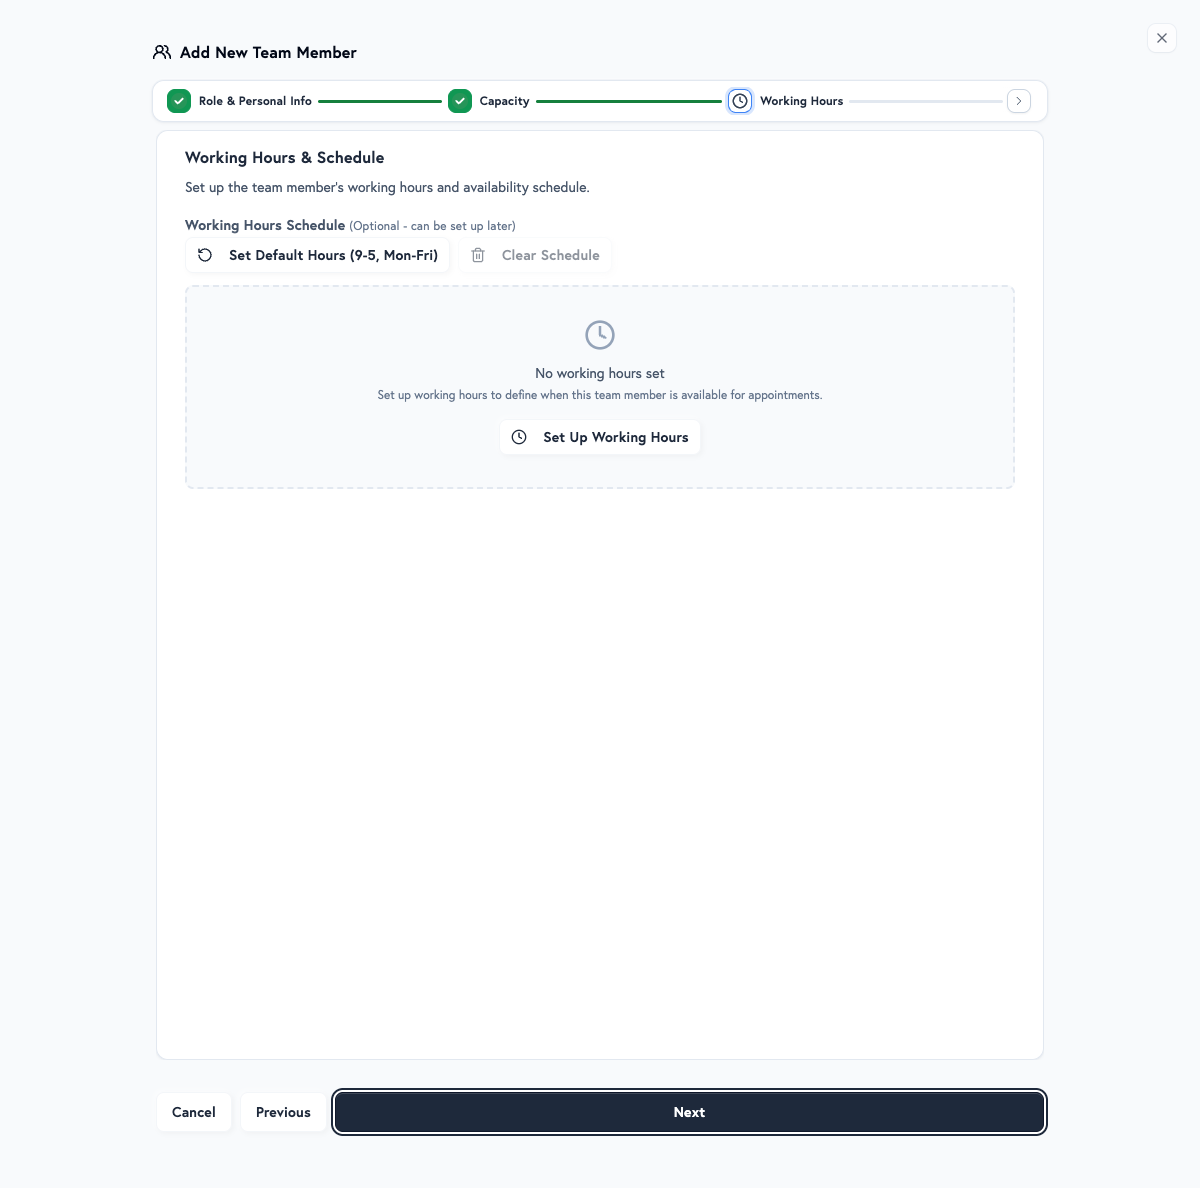
- Select Next. On Working Hours, select Set Up Working Hours and change the days and times, or leave the step empty to set hours later.
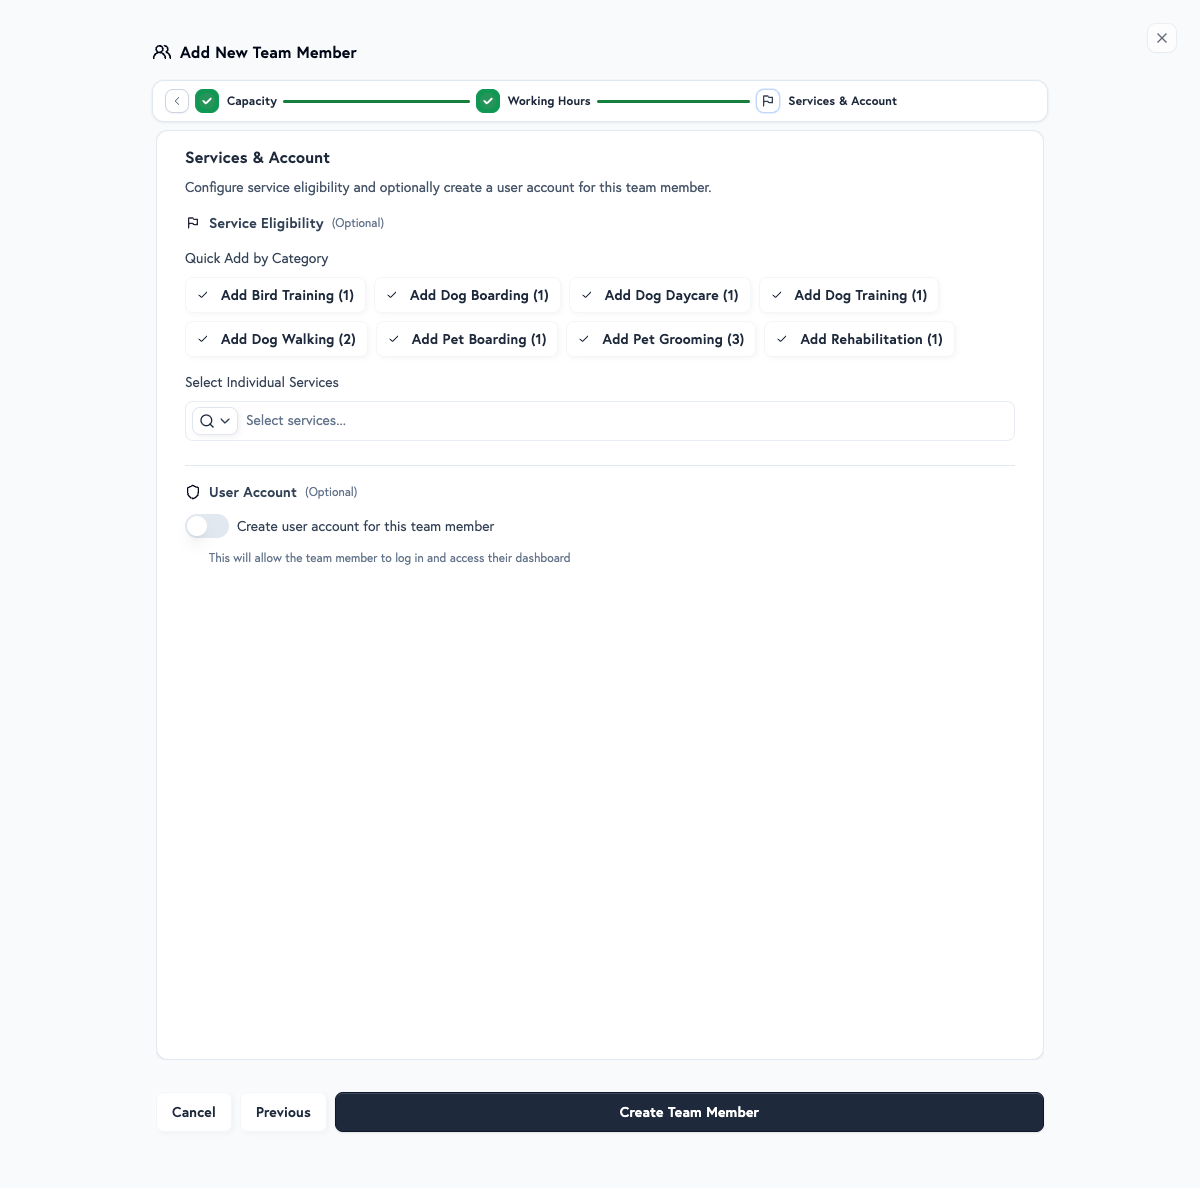
- Select Next. On Services & Account, choose the services this person performs.
- Optional: switch on Create user account for this team member to give them a login.
- Select Create Team Member.
To start from someone you already have, select Clone from another team member on Role & Personal Info, or Clone This Team Member on their profile. With more than one location, Add New also offers Add from Another Location. Bulk Import Team Members & More opens the bulk import template, a spreadsheet.
Role and personal information
First Name, Surname and Contact Email are required. Contact Phone is optional unless the team member needs a login, and it is required for the Owner Admin. Team member contact details are only visible to you, and Petboost does not contact your team unless you turn on notifications in settings.
Under Advanced options, Profile Photo helps your team recognise each other, and Calendar Colour (Optional) is the colour of this person's appointments when the calendar's Colour Mode is Team Member. Without one, cards use the default slate colour.
Capacity
Capacity is how many appointments this team member can handle at the same time. It is not a daily limit: a capacity of 2 means two pets at once, and many more over the day. See Pets at a time vs daily total. The step suggests a typical range of 1 to 10 for most roles, and up to 50 for managers. Base it on the person's experience, the services they perform and how physically demanding those services are, and change it later as they settle in.
With capacity set, Allow more siblings side-by-side lets pets from the same family share places beyond that number, up to a Same-family limit. With no capacity set, the team member is Not Bookable until you add it.
Working hours
Set Up Working Hours and Set Default Hours (9-5, Mon-Fri) both fill in Monday to Friday, 9am to 5pm. Change each day to match the person: a full-time team member might follow your opening hours, a part-time team member works set days, a contractor works the hours you agreed, and weekend staff work Saturday and Sunday only. Clear Schedule empties it again.
To give someone different hours for a date or a date range, such as a school holiday roster, open their profile after you create them and choose Working Hours, then Special Dates, then Create Special Dates.
Services and account
Under Services They Perform, Quick Add by Category adds every service in a category at once, and Select Individual Services adds them one at a time. Only assign services the team member is qualified and comfortable performing, taking account of their skills, experience, certifications and the service's complexity.
Create user account for this team member gives them a login to Petboost. It needs a Login Email and a Phone Number. Temporary Password is optional: without one, the team member receives an email to set up their account. What they can open depends on their role. Create a login only for someone who needs to use Petboost.
Find a team member
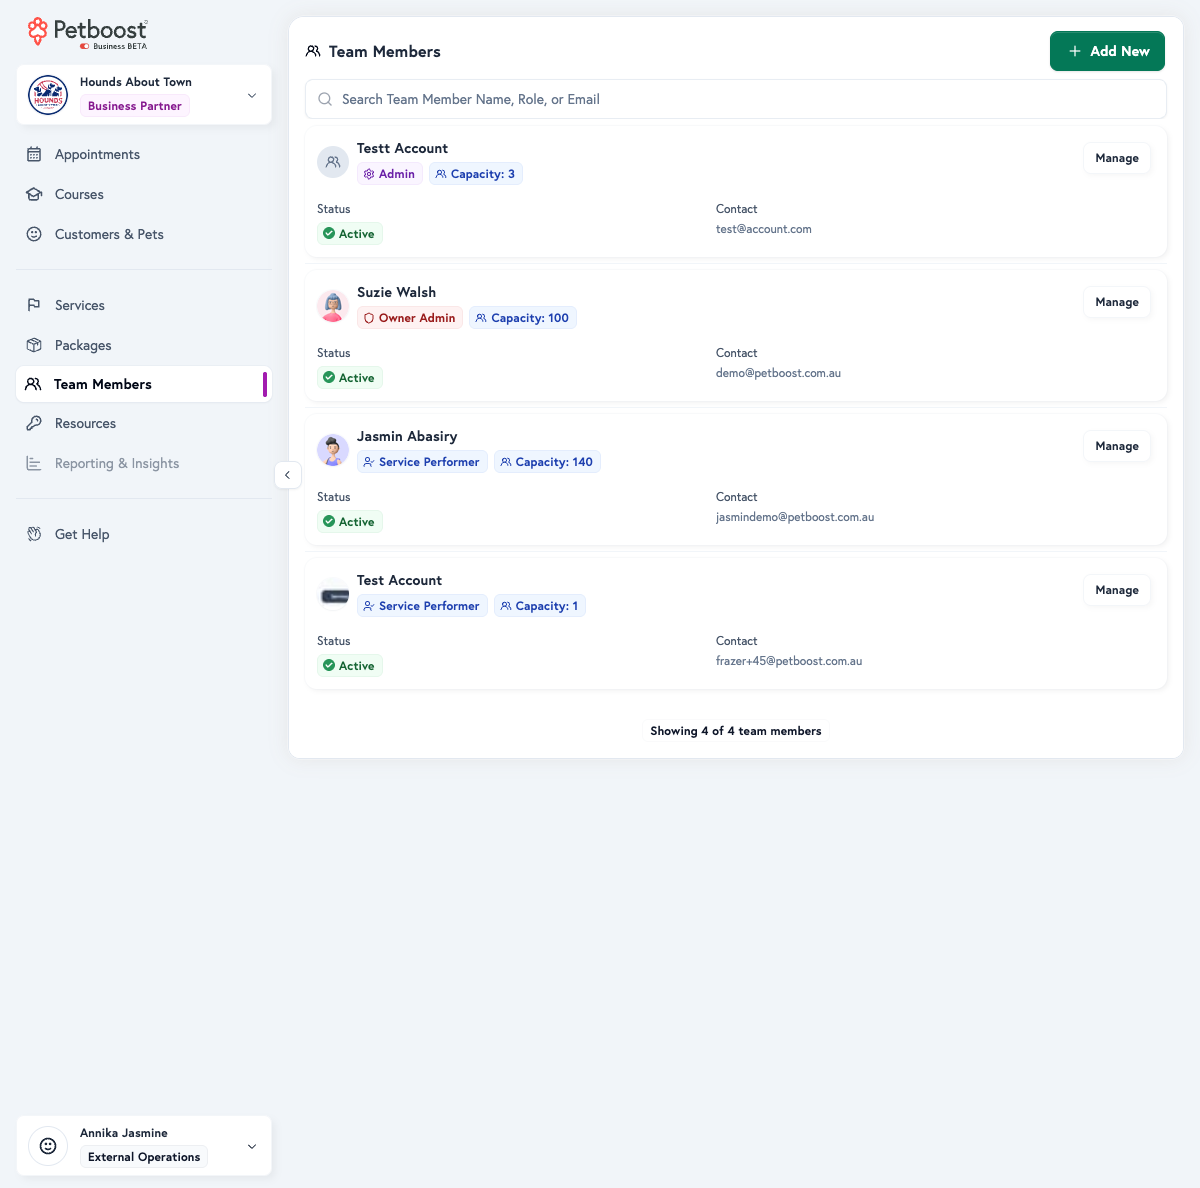
The list shows each team member's photo and name, their role, how many pets they take at once (or No Capacity Set), whether they are Bookable and their contact email and phone. Select an email or phone number to copy it.
- Open Team Members.
- To find someone, type in the search box. It matches the name, the role and the contact email.
- To see archived team members, open Filters and switch on Include Archived Team Members. They show an Archived badge.
- Optional: open Sort & Group to group by Role, or sort by Name, Capacity or Bookable Status.
- Select Manage on the team member.
Change a team member's details
A change to a team member applies to new bookings. Existing appointments are not changed.
- Open Team Members and select Manage on the team member.
- Choose the section to change. On a section, Jump to moves between them.
- Make the change. It waits in Pending Changes at the foot of the page.
- Select Publish Changes, tick the box in Before You Publish, then select Publish Changes.
A profile has these sections:
- Appointments: the team member's appointment history and upcoming bookings
- Personal Details: First Name, Surname, Role, Email Address and Phone Number
- Services: the services they perform. This section saves in its own Manage Services panel rather than through Publish Changes
- Courses: the course templates they teach, shown once you have course templates. You add a team member to a course on the course template
- Capacity: Pets at a Time and the same-family limit
- Working Hours: their weekly Default Hours, sessions and Special Dates for set date ranges
- Leaves & Restrictions: leave and blocked time. Add, then Add Leave, adds a one-off leave, and Batch Create adds leave that repeats. Leave saves straight away
Beside the sections, the summary card shows the team member's role, Bookable and login badges, contact details, Calendar colour with Set or Change, and weekly working hours, with upcoming leave and blocked time underneath. Select the photo to change it.
Choose the services a team member performs
Assign a service to everyone who is qualified to do it, so they can be booked for it.
- Open Team Members and select Manage on the team member.
- Choose Services.
- Select Manage. With nothing assigned yet, the button reads Assign Services.
- In Manage Services, choose the services, then select Save Changes.
Stay services and course lessons never appear here. A stay service is booked into resources rather than team members, and a course's instructors are set on its course template. See Service Assignment & Skills for how an assignment decides who can be booked.
Change a login password
A business login password is changed with a reset email. There is no field in Settings for an old and a new password, and that includes the owner's login: the owner is a team member too.
- Open Team Members and select Manage on the person. To change your own password, choose your own name.
- Select Send Password Reset. It shows when the profile has a login, marked Login Active.
- The person opens the email at their login address and sets a new password.
If you cannot sign in, use Forgot your password? on the business.petboost.com login screen.
Do not share one owner password with the team. Give each person their own login with Create Login, which shows on a profile marked No Login. Full steps, a front desk login and the difference from a customer password reset are in Change your account password.
Troubleshooting
A service cannot be assigned to a team member
Stay services and course lessons do not appear on a team member's Services section. Check the service's type and its Team & Resources tab on Services.
A team member does not appear when you book
Open the team member on Team Members and check:
- The team member is not archived, and shows Bookable
- Their Working Hours cover the time you are booking
- They are assigned to the service, when the service lists specific team members
A team member's capacity looks wrong
Open Capacity on their profile and check Pets at a Time. It is how many pets they can have booked at the same time, not a daily total. Review their workload, and change the services on their Services section if needed.
Related articles
- Rosters & Schedules: weekly rosters, split shifts, special dates and copying schedules
- Capacity & Workload Management: set how many pets a team member takes at a time
- Working Hours & Leave Management: schedules, time off and availability
- Service Assignment & Skills: match team members to the right services
- Bulk Operations: update several team members at once
- Change your account password: reset your login or a staff login
- Team Member FAQ: common questions answered
Next steps
- Assign team members to a service on Services, and set its requirements and eligibility
- Set up locations and capacity on Resources
- Book appointments with your team on Appointments
- Assign instructors to classes on Courses
- Manage customer relationships on Customers & Pets
- Sell and track prepaid credits on Packages
- Set team booking rules in Booking Settings, team messages in Notifications and automated workflows in Automatic Actions, all under Settings
Related FAQs
- How do I change my account password?
- How do I set working hours for team members?
- Can I set up temporary schedules for specific date periods?
- What's the difference between Service Provider and Support Staff?
- Team member not appearing in appointment creation
Need help? Contact support or select Get Help in your dashboard to chat with our team.